The frustrating gap between your saxophone sound and your teacher’s has little to do with the price of your instrument and everything to do with mastering a precise, internal ‘tonal system’.
- Your mouthpiece’s geometric design (its acoustic interface) shapes your sound far more than its material.
- A stable, automatic embouchure that creates a perfect seal is the goal, not one that ‘muscles’ the sound into submission.
- True progress comes from diagnosing and refining your technique before ever considering a costly equipment upgrade.
Recommendation: Start each practice session by calibrating your personal tonal system with focused long tones before moving on to any other material.
You practice diligently. You run your scales, you work on your pieces, and you listen to your teacher produce a sound that is rich, vibrant, and effortless. Then you put the horn in your mouth, and despite your best efforts, the tone is stuffy, airy, and resistant. It’s a common and deeply frustrating experience for many saxophone students in the UK and beyond. The immediate temptation is to blame the tools: « If only I had a better saxophone, » or « Maybe I need that expensive vintage mouthpiece. »
The conventional wisdom often sends you down a rabbit hole of gear acquisition. Forums and shops are filled with advice on finding the perfect reed, the magic mouthpiece, or the professional-grade horn that will supposedly unlock your sound. While equipment certainly plays a role, this focus often obscures the fundamental truth that generations of great saxophonists have understood. The source of a beautiful, singing tone is not external; it is internal. It’s a physical system the player builds within their own body.
But what if the key wasn’t in buying a better horn, but in building a better engine to drive it? This guide will bypass the gear-obsessed platitudes to give you a pedagogical framework. We will deconstruct the mechanics of professional tone production, focusing on the invisible techniques that make the real difference. We will explore the true function of the mouthpiece as an acoustic interface, build an embouchure that produces tone automatically, and establish a practice hierarchy that prioritizes player skill over equipment cost.
This article provides a structured path to understanding and developing your own unique ‘aural fingerprint’. By exploring each component of your personal tonal system, you will gain the technical precision to close the gap between the sound you have and the sound you dream of. The following sections break down this journey into clear, actionable steps.
Summary: From a Stuffy Sound to a Singing Tone
- Why Did Changing Mouthpieces Transform Your Sound More Than Upgrading Saxophones?
- How to Build an Embouchure That Produces Beautiful Tone Automatically?
- Alto or Tenor: Which Saxophone Should You Start On for Long-Term Success?
- The Saxophone Upgrade Mistake That Delays Your Progress by Years
- What Should You Practice First Each Day for Fastest Saxophone Improvement?
- How to Develop Dynamic Control So Subtle That Listeners Feel Without Noticing?
- Why Can’t You Play Blue Notes in Tune Like Other Notes?
- Why Do Your Blues Licks Sound Like Exercises Instead of Emotional Expression?
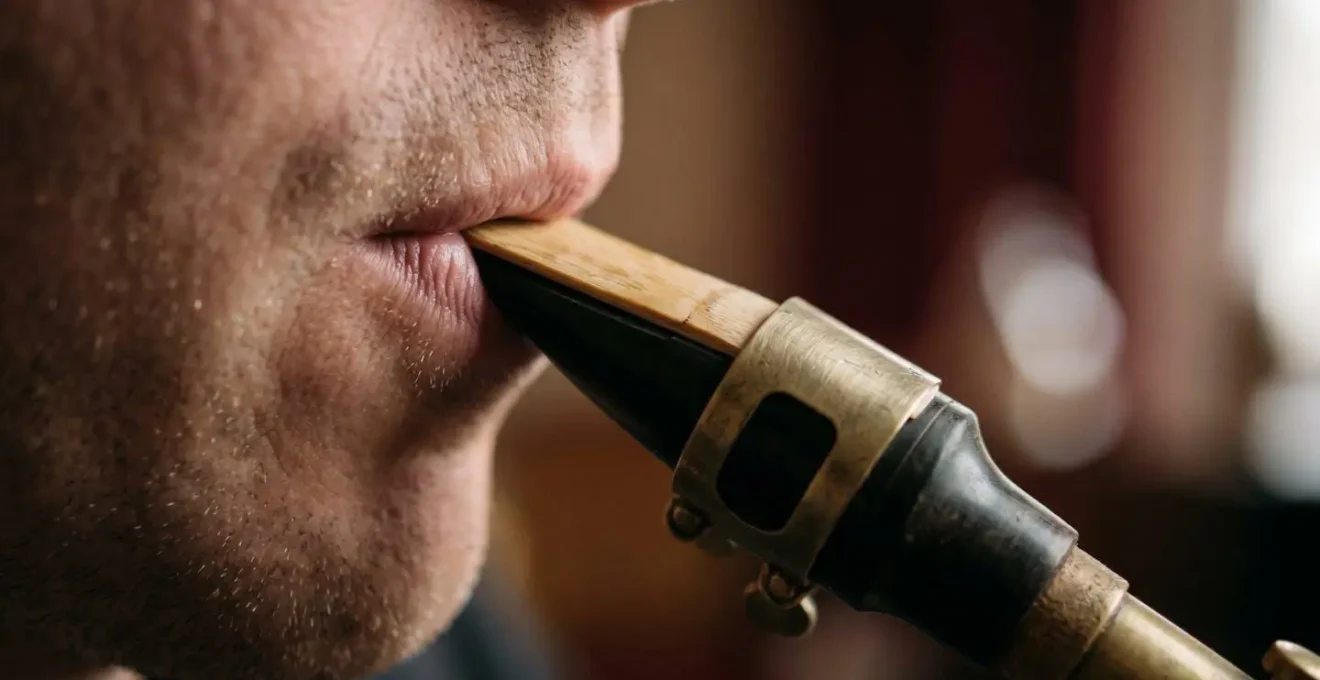
Why Did Changing Mouthpieces Transform Your Sound More Than Upgrading Saxophones?
One of the first major « aha! » moments for a developing player is often swapping mouthpieces. Suddenly, the sound can go from dark and stuffy to bright and cutting, or vice versa. This experience is so profound it often leads to the belief that the mouthpiece material—be it hard rubber, metal, or plastic—is the source of the magic. However, this is a fundamental misunderstanding of the physics at play. The real transformation comes from the mouthpiece’s internal geometry, not its substance.
Think of the mouthpiece not as a sound source, but as the acoustic interface where your breath and embouchure are converted into a vibrating column of air. The key elements are the internal dimensions: the baffle (the ceiling just past the tip), the chamber (the internal volume), and the rails (the thin edges running alongside the reed). As Taming The Saxophone notes, « tiny changes to the baffle, chamber and rails can make a hugely significant difference. » A high baffle creates a faster, brighter, and louder sound, while a low, scooped-out baffle produces a darker, warmer tone.
This is why material is largely irrelevant. The metal of a mouthpiece doesn’t vibrate to create sound; the reed does. The sound is then shaped by the air column inside the mouthpiece and saxophone. In fact, according to acoustic physics research, the material itself has virtually no direct effect on the audible tone. The reason a new mouthpiece feels like a bigger upgrade than a new horn is that you are fundamentally changing the blueprint of your acoustic interface, which has a more immediate and dramatic impact on resistance and tone colour than the subtle acoustic refinements of a more expensive saxophone body.
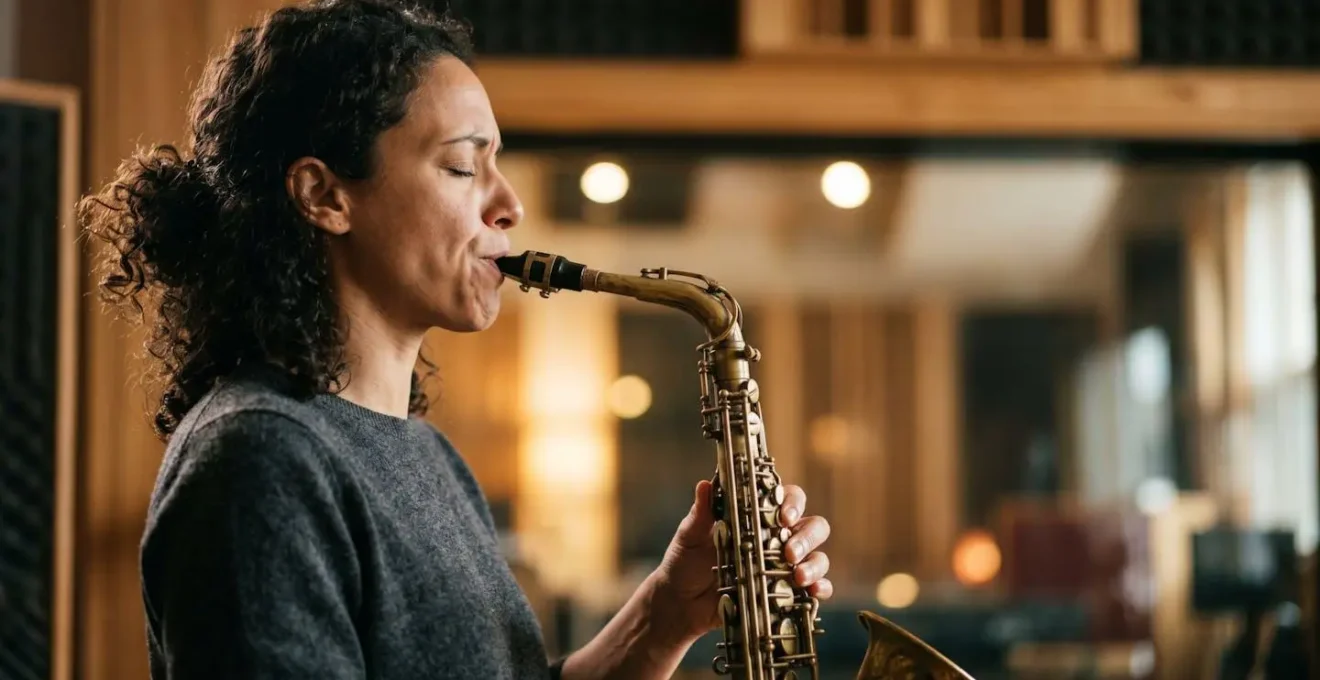
How to Build an Embouchure That Produces Beautiful Tone Automatically?
If the mouthpiece is the interface, the embouchure is the engine. A stuffy, airy, or inconsistent tone is almost always traceable to an inefficient embouchure. Many students are told to « firm up the corners » or « don’t bite, » but this advice is too vague. The goal is not to « muscle » the sound, but to build a stable, precise muscular structure that forms a perfect, airtight seal around the mouthpiece. This allows the reed to vibrate with maximum freedom and efficiency.
The image above reveals the truth: the embouchure is a system of fine motor control. The lower lip acts as a firm, fleshy cushion against the reed, while the surrounding muscles provide a stable anchor. As saxophone pedagogue Steve Turner explains, « The embouchure’s primary job is to create a perfect, airtight seal, not to ‘muscle’ or ‘control’ the sound. » Force and biting only dampen the reed’s vibration, leading to a choked sound. A great embouchure becomes automatic, holding this perfect seal without conscious thought, freeing you to focus on musical expression.
Developing this muscular structure requires targeted exercise, even away from the horn. You can build these specific muscles by closing your teeth in a relaxed bite, pressing your lips firmly together, and then slowly separating your teeth as far as possible while keeping your lip corners locked in place. Holding this tension builds the exact muscles needed for a stable saxophone embouchure. Over time, this transforms the embouchure from a source of constant struggle into a reliable foundation for your tonal system. It’s not about playing for more hours; it’s about building the right muscular hardware.
Alto or Tenor: Which Saxophone Should You Start On for Long-Term Success?
A frequent question for aspiring saxophonists is where to begin: with the bright, nimble alto or the deep, soulful tenor? The choice can have a significant impact on your early development and long-term enjoyment, primarily due to physical and acoustic differences. While there is no single « correct » answer, understanding the trade-offs is crucial for setting yourself up for success. In general, the alto saxophone is the most widely played of the saxophone family due to its smaller size and lower air requirement, making it physically more accessible for younger or smaller-statured players.
However, the decision should be based on a combination of physical comfort, the sound you aspire to create, and the musical genres that inspire you. The tenor, with its larger mouthpiece and more relaxed embouchure requirements, can sometimes be more forgiving for beginners struggling with the precise control needed in the alto’s upper register. Conversely, the alto’s lighter weight and smaller key spacing can feel more manageable.
The following table, based on common pedagogical comparisons, breaks down the key differences to help guide your choice. Consider not just what is « easiest » today, but which instrument’s voice and role resonates most with your musical goals.
| Feature | Alto Saxophone | Tenor Saxophone |
|---|---|---|
| Size & Weight | Smaller and lighter, easier to handle | Larger and heavier, requires more physical effort |
| Sound Character | Higher-pitched, cutting lead voice in funk/big band | Full, deep, rich sound; husky conversational role in jazz/rock |
| Air Requirement | Requires less air, more accessible for beginners | Needs more air support for low notes |
| Embouchure Control | Requires more precise control in upper register | More relaxed embouchure due to larger mouthpiece |
| Learning Difficulty | Generally easier due to simpler size/weight | Not significantly harder, but demands more physicality |
| Musical Roles | Lead instrument; most solo opportunities in jazz band | More versatile including famous saxophone solos |
| Price Point | More affordable, budget-friendly for beginners | More expensive than alto |
Ultimately, the best instrument to start on is the one that you are most excited to pick up every day. The « long-term success » factor is driven more by passion and consistent practice than by the initial choice between these two fantastic instruments.
The Saxophone Upgrade Mistake That Delays Your Progress by Years
Here lies the most expensive and demotivating trap for a developing saxophonist: the belief that a new, professional-grade horn will solve all their tonal problems. You see your hero playing a vintage Selmer Mark VI, and you’re convinced that if you just had that instrument, you would sound like them. This is a powerful illusion that can cost you thousands of pounds and years of delayed progress. As the experts at BetterSax state clearly, « It is a common misconception that you need a very expensive instrument and mouthpiece to sound good and have a great tone. This is false. »
A professional saxophone offers marginal gains in intonation consistency, keywork ergonomics, and tonal complexity. It does not, however, create your core sound. Your core sound—your personal aural fingerprint—is produced by your body: your airflow, your oral cavity shape, and your embouchure. A £5,000 saxophone will still sound stuffy and weak if the player’s fundamental tonal system is undeveloped. The real path to improvement lies in a rigorous process of self-diagnosis, addressing the player first and the equipment last.
Before you even think about browsing for a new saxophone, you must work through a diagnostic hierarchy. This methodical approach forces you to isolate variables and identify the true source of your tonal issues, which is almost always rooted in technique or setup, not the instrument itself. As detailed in resources like those from guides on saxophone tone development, this process saves both time and money.
Your Pre-Upgrade Diagnostic Checklist: 5 Steps to Take Before Buying a New Horn
- Check the Reed: Is it fresh? Is it perfectly centered on the mouthpiece? Critically, is it the right strength for your current embouchure and air support, not just what a pro uses?
- Evaluate Your Technique: Record yourself playing long tones. Is the sound consistent or does it waver? Check your embouchure in a mirror for stability. Are you supporting the air from your diaphragm, or are you using shallow, tense breaths?
- Assess Your Mouthpiece Setup: Does your mouthpiece match your physical capabilities? A mouthpiece with a very open tip requires immense air support that a student may not have, leading to an airy sound. Ensure your setup isn’t fighting you.
- Inspect Horn Condition: Take your current saxophone to a qualified repair technician. A tiny, imperceptible leak in a pad can make a horn feel incredibly resistant and sound stuffy. This is the most common and cheapest « upgrade » you can make.
- Consider an Upgrade Only as a Last Resort: Only when a technician confirms your horn is in perfect working order and your teacher confirms your technique is solid should you consider that the instrument itself is a verifiable limitation to your progress.
Working through this checklist will, in 99% of cases, reveal the true issue lies in one of the first four steps. Solving it there will lead to more significant and lasting improvement than any new saxophone ever could.
What Should You Practice First Each Day for Fastest Saxophone Improvement?
The secret to rapid improvement isn’t the number of hours you practice, but the focus and priority within those hours. For a saxophonist, the first 10-15 minutes of any practice session are the most critical. This is the time to calibrate your entire tonal system for the day. Instead of jumping into difficult scales or a complex jazz solo, you must begin with the most fundamental exercise of all: the long tone.

Practicing long tones is not about endurance; it’s about mindfulness and proprioceptive feedback. It’s your daily diagnostic. As you hold a single, simple note (like a middle G), you should be listening with intense focus. Is the sound pure and steady, or is there a waver? Is the start of the note clean, or is it fuzzy? Can you hold the note at the softest possible volume without the tone collapsing? This exercise trains your brain and body to connect, refining the embouchure and air support needed for a consistently beautiful sound across the entire instrument. While there’s no magic number, a minimum of 30 minutes daily practice is the benchmark given by professional pedagogy guidelines for any serious learning.
The transformative power of this focused, fundamental work is well-documented. It’s the slow, steady path that yields exponential results, far outpacing someone who spends hours on complex material with a poor core sound.
Case Study: The Compounding Effect of Daily Long Tones
Students following a structured 30-minute daily long tone routine reported instructor-verified tone quality improvements within 3 weeks of consistent practice. The routine emphasized starting each session with a single perfect note on middle G, maintaining it with stability and resonance before progressing to chromatic long tones across the full range. One documented student testimonial noted their instructor’s unsolicited compliment on ‘lovely tone’ improvement after implementing the daily routine for approximately 8 weeks, demonstrating the compound effect of consistent fundamental practice over equipment upgrades.
By starting every session with long tones, you are programming your body for success. You are ensuring that every other exercise you play that day is built upon the foundation of a solid, resonant, and controlled sound.
How to Develop Dynamic Control So Subtle That Listeners Feel Without Noticing?
Once you have established a stable, beautiful core sound, the next layer of artistry is dynamics. This isn’t just about playing « loud » and « soft. » True dynamic control is about shaping phrases with such subtlety that the listener *feels* the emotion without consciously noticing the volume changes. This is the world of micro-dynamics, where individual notes swell and taper, creating a sense of life and forward motion in your lines. This level of control is directly tied back to the physical systems you’ve been building.
As confirmed by BetterSax, « The quality of our sound is heavily dependent on the strength of the muscles in our face that form the embouchure. » A strong, stable embouchure allows you to make minute adjustments to your air speed without your tone quality or pitch wavering. The ability to play with a full, resonant sound at an extremely low volume (sub-toning) is a hallmark of a master player. It demonstrates supreme control over both the air column and the embouchure, allowing for the widest possible expressive palette.
Developing this control requires specific exercises that go beyond simple loud/soft playing. These exercises train you to separate air volume from air speed and to maintain tonal integrity at all dynamic levels.
- Crescendo-Decrescendo Long Tones: Hold a single note and swell from the quietest possible sound (pianissimo) to your loudest (fortissimo) and back again, ensuring the pitch remains perfectly stable and the tone quality (timbre) does not become thin or harsh.
- Diamond-Shaped Notes: Practice playing individual notes (e.g., a series of crotchets) with a slight swell and taper on each one (<>). This makes a simple scale sound instantly more musical and alive.
- Air Speed Modulation: At a constant, medium volume, focus on changing your air from a « hot, slow » stream to a « cold, fast » stream. You’ll notice the tone colour change from darker to brighter without a significant change in volume. This is key to expressive colour.
- Sub-tone Practice: This is the ultimate test. Practice playing scales and simple melodies at the lowest possible volume across the full range of the saxophone, striving for a full, « breathy » but resonant sound.
Mastering these exercises gives you the tools to move beyond playing notes and begin crafting compelling musical sentences. It’s the difference between speaking in a monotone and speaking with engaging inflection.
Why Can’t You Play Blue Notes in Tune Like Other Notes?
One of the most alluring and mystifying sounds in jazz and blues is the « blue note. » You hear a player bend and scoop into a note, giving it a soulful, crying quality that seems to exist somewhere between the keys of a piano. When you try to replicate it, you either sound out of tune or the effect is clumsy. The reason is simple and profound: blue notes are *supposed* to be out of tune. As Taming The Saxophone’s advanced guides explain, « Blue notes are ‘out of tune’ by design; they are microtonal expressions that exist between the fixed pitches of the Western scale. »
The saxophone is uniquely suited to this, as it’s a flexible-pitch instrument (unlike a piano). A player can use their embouchure and oral cavity to bend a note’s pitch significantly. A classic blue note, like a flattened third or seventh, isn’t a different fingering; it’s the standard fingering bent down by a controlled amount. The « magic » is simply precise, repeatable muscle memory. You’re not aiming for a wrong note; you’re aiming for a specific, expressive pitch *between* the notes.
This is a physical skill that can be practiced and mastered. It involves manipulating your jaw and the vowel shape inside your mouth to alter the pitch of the air column without losing the core of the sound. The following exercise breaks down the mechanics:
- Start Stable: Finger a standard, in-tune note like F or G and play it with your best, most stable long-tone sound.
- Drop the Jaw: While maintaining firm lip corners and constant air pressure, slowly and deliberately drop your jaw. You will hear the pitch begin to fall.
- Change the Vowel: To bend the pitch even further and more smoothly, change the vowel shape inside your mouth from a high « ee » sound to a low « oo » or « oh » sound. This opens the oral cavity and lowers the pitch.
- Return to Pitch: Smoothly reverse the process, raising the jaw and returning to the « ee » vowel shape to bring the note back to its original, in-tune pitch.
- Practice Across the Range: Repeat this on various notes up and down the horn to build consistent control, so you can call upon this expressive bend at any time.
By practicing this, you are turning an abstract, « magical » sound into a concrete, controllable technique. You are adding the essential vocabulary of the blues to your expressive toolkit.
Key Takeaways
- Your core saxophone sound is generated by your physical ‘tonal system’ (air, embouchure, oral cavity), not the instrument itself.
- Focus on mastering technique and diagnosing issues with your playing before ever considering an expensive equipment upgrade.
- The most effective practice starts with mindful long tones to calibrate your sound foundation for the day.
Why Do Your Blues Licks Sound Like Exercises Instead of Emotional Expression?
You’ve learned the blues scale. You’ve transcribed a few licks from your favourite players. You play them over a backing track, and yet, they sound flat, mechanical, and lifeless—like a technical exercise. Meanwhile, a great player can take the same five notes and make them weep or shout. The difference isn’t the notes; it’s the phrasing. As one pedagogical resource on blues expression puts it, « An exercise has metronomically even notes; emotional playing uses phrasing—the human art of pushing, pulling, and placing notes around the beat. »
Emotional expression on the saxophone comes from the « punctuation and inflection » of your musical language. It’s about how you start a note (articulation), how you end it, how long you hold it, and precisely where you place it in relation to the metronomic pulse of the music. A machine can play the right notes at the right time. Only a human can play a note slightly behind the beat to create a lazy, relaxed feel, or push a note just ahead of the beat to create tension and excitement. This is the art that separates a technician from a musician.
A powerful method for developing this skill, as documented in guides like those on practice routines for improvising saxophonists, involves intense creative limitation.
Pedagogical Method: The ‘One Lick, Twenty Ways’ Challenge
This approach restricts a student to a single, simple 5-note blues lick for an entire practice week. The student is forbidden from learning new notes or licks. Instead, they are challenged to play that one identical lick in 20 different expressive ways. They must achieve this variation solely by changing the rhythm, articulation (staccato, legato, accents), dynamics, and placement of the phrase relative to the beat. This constraint-based method forces the player to stop relying on note choice for musical interest and instead develop the expressive delivery mechanisms that give music its emotional weight. It transforms a mechanical pattern into a deeply felt musical statement.
By focusing on how you play rather than what you play, you begin to unlock your own musical voice. Your licks stop being exercises and start becoming stories.
Now that you understand that the source of a great sound is internal, the next logical step is to systematically apply these principles. Begin today by implementing the pre-upgrade diagnostic checklist not as a one-time event, but as a continuous process of refinement for your playing.