The quality of your recordings has less to do with your microphone’s price tag and more to do with your control over the physics of sound capture.
- The acoustics of your room and the microphone’s position have a greater impact on the final sound than the microphone’s internal electronics.
- Using the *right type* of microphone for your environment (often a cheaper dynamic mic in untreated rooms) yields better results than using a high-end mic in the wrong space.
Recommendation: Stop chasing the next gear upgrade and start mastering the foundational techniques of room acoustics and microphone placement.
You’ve done the research. You saved up and invested in a quality £500 microphone, expecting it to be the final piece of the puzzle. Yet, your recordings still sound thin, distant, and distinctly amateur. Meanwhile, you hear bedroom producers on YouTube and Spotify getting punchy, clear, radio-ready vocals with mics that cost less than £100. It’s a deeply frustrating experience that leads many home recordists to a single, flawed conclusion: they must need even *more* expensive gear—a better preamp, a new interface, or perhaps a £1,000 microphone.
The common advice is often to buy a large-diaphragm condenser microphone and some acoustic panels. While not entirely wrong, this gear-first approach misses the fundamental point. It’s like trying to fix a blurry photograph by buying a more expensive camera, when the real problem is that you haven’t learned how to focus the lens. The truth is, that £500 microphone is more than capable of professional results. The problem isn’t the tool; it’s the technique.
But what if the key wasn’t in adding more gear, but in subtracting variables and mastering the environment you already have? This guide takes a different approach. We’re not going to give you a shopping list. Instead, we’re going to give you the engineering mindset. We will explore the physics of why mic placement is paramount, how to diagnose and tame your room for free, and why choosing the « right » microphone is about function, not price. By the end, you’ll understand how to make your current gear sound exceptional, and why that £100 mic in the right hands will always outperform a £500 mic in the wrong ones.
This article will deconstruct the common issues that prevent home recordists from achieving professional sound. We will break down the essential principles of sound capture, providing a clear path from amateur frustration to professional-sounding results, without you needing to spend another penny.
Summary: From Frustration to Focus: An Engineer’s Guide to Home Recording
- Why Does Moving Your Mic 10cm Change the Sound More Than Buying a Better One?
- How to Fix the Room Problems That Make Every Microphone Sound Bad?
- Dynamic or Condenser: Which Microphone Type Records Your Voice Better?
- The Microphone Buying Mistake That Fills Your Cupboard Without Improving Your Recordings
- Which 3 Microphones Cover 90% of Home Recording Situations?
- Why Does Adding More Microphones Make Your Drum Recording Sound Thinner?
- When Does a £2,000 Interface Sound Better Than a £200 One and When Doesn’t It?
- Why Do Your Multitrack Recordings Sound Worse Than Simple Two-Track Captures?
Why Does Moving Your Mic 10cm Change the Sound More Than Buying a Better One?
The single most powerful, yet overlooked, tool in your recording arsenal is distance. Moving your microphone by just a few centimetres can have a more dramatic effect on your sound’s character than swapping a £100 mic for a £500 one. This isn’t opinion; it’s physics. The phenomenon responsible is called the proximity effect, a principle inherent to all directional microphones (like the cardioid mics most commonly used for vocals). As the sound source gets closer to the microphone’s diaphragm, low-frequency content is exponentially boosted.
This isn’t a subtle change. Technical measurements show that getting within 15-20cm of a mic can create a 3-6dB boost in the 100-200Hz range. That’s enough to turn a clear, balanced vocal into a boomy, muddy mess. Conversely, moving a few centimetres further away can thin out the sound. Your expensive condenser microphone isn’t « bad »; it’s simply capturing this change with ruthless accuracy. A cheaper microphone might have a less detailed response, inadvertently masking these dramatic tonal shifts.
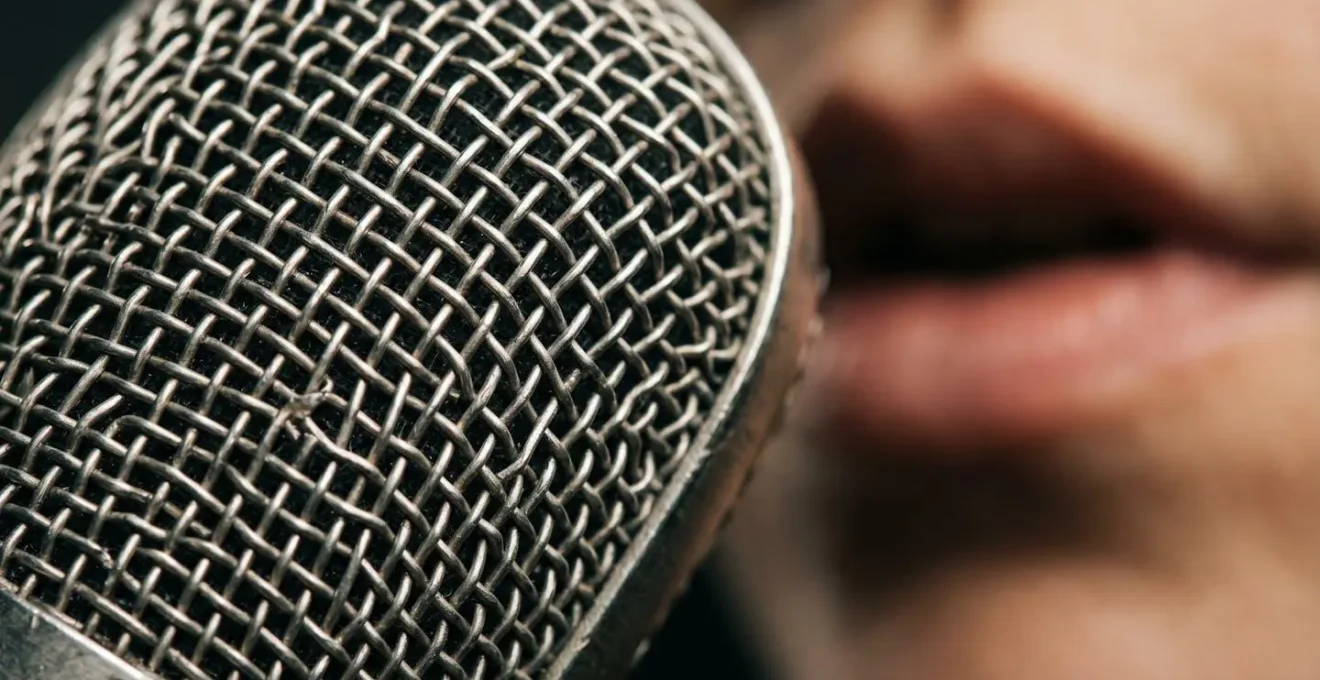
As the image above illustrates, the relationship between the sound source and the microphone capsule is one of intimate detail. The « sweet spot » is a precise balance, not a general area. This is why engineers obsess over placement. They are not just pointing a mic; they are actively equalising the source with distance. Finding that perfect spot—where the proximity effect adds warmth without mud, and the distance provides clarity without sounding thin—is a skill. It costs nothing to practice but delivers a sonic improvement that no equipment upgrade can replicate.
How to Fix the Room Problems That Make Every Microphone Sound Bad?
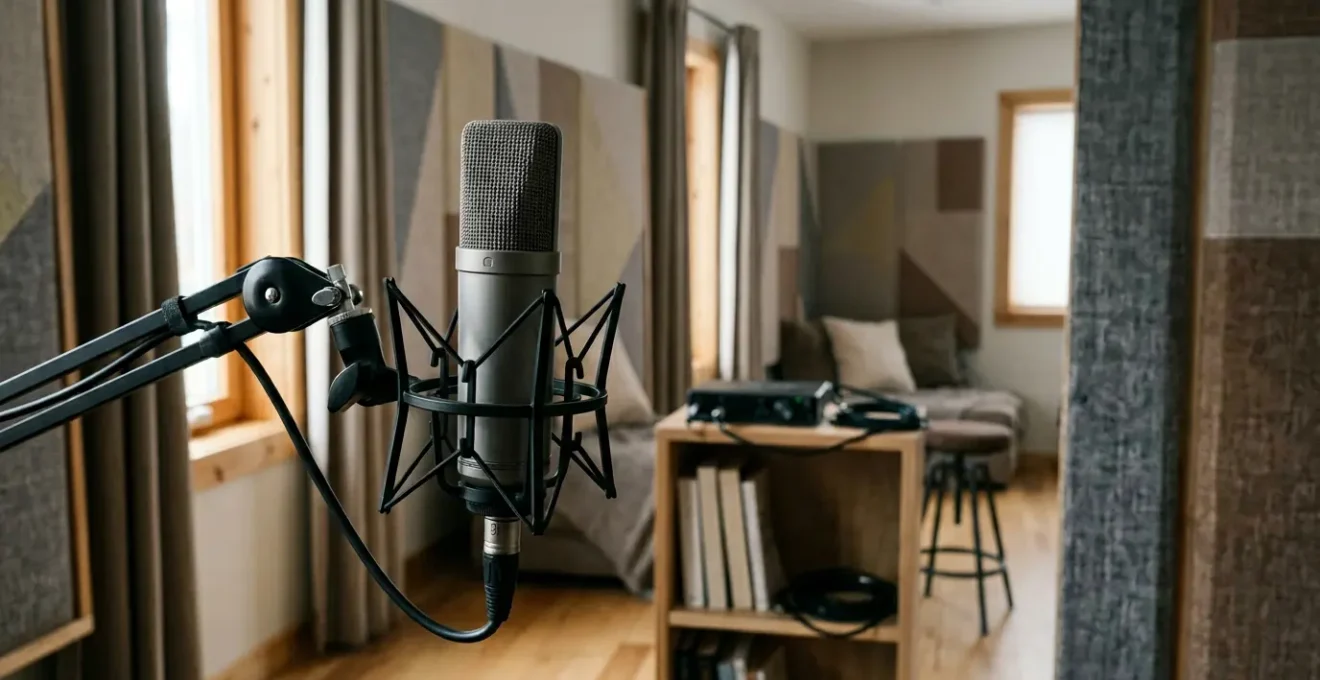
Before you even think about your microphone, you need to consider what it’s recording. In a home studio, you’re never just recording a voice or a guitar; you’re recording the instrument *plus the room it’s in*. An untreated room with hard, parallel surfaces (bare walls, windows, wooden floors) is a microphone’s worst enemy. Sound waves bounce around, creating a wash of chaotic reflections known as reverberation. A high-quality condenser mic, with its exceptional sensitivity, will capture every single one of these unflattering echoes, resulting in a recording that sounds distant, hollow, and unprofessional.
The professional solution is « acoustic treatment, » but you don’t need to spend hundreds on foam panels to solve the core problem. Your goal is simple: absorption. You need to surround your recording position with soft, irregular surfaces that trap sound energy instead of reflecting it. You likely already own the best tools for the job: clothes, duvets, pillows, sofas, and bookshelves filled with books.
You can diagnose your space for free with the « clap test »:
- Walk around your home and clap your hands sharply in each room.
- Listen carefully to the sound *after* the initial clap. Do you hear a long, metallic, or « ringy » tail? That’s bad. That’s the sound of reflections you need to eliminate.
- Now, try clapping in a small bedroom with a thick carpet, curtains, and a bed. The sound should die off almost instantly. That’s good. That’s absorption at work.
- Often, the best-sounding space in a house is the one you’d least expect: a walk-in cupboard packed with clothes. The dense, soft fabrics are a near-perfect acoustic absorber.
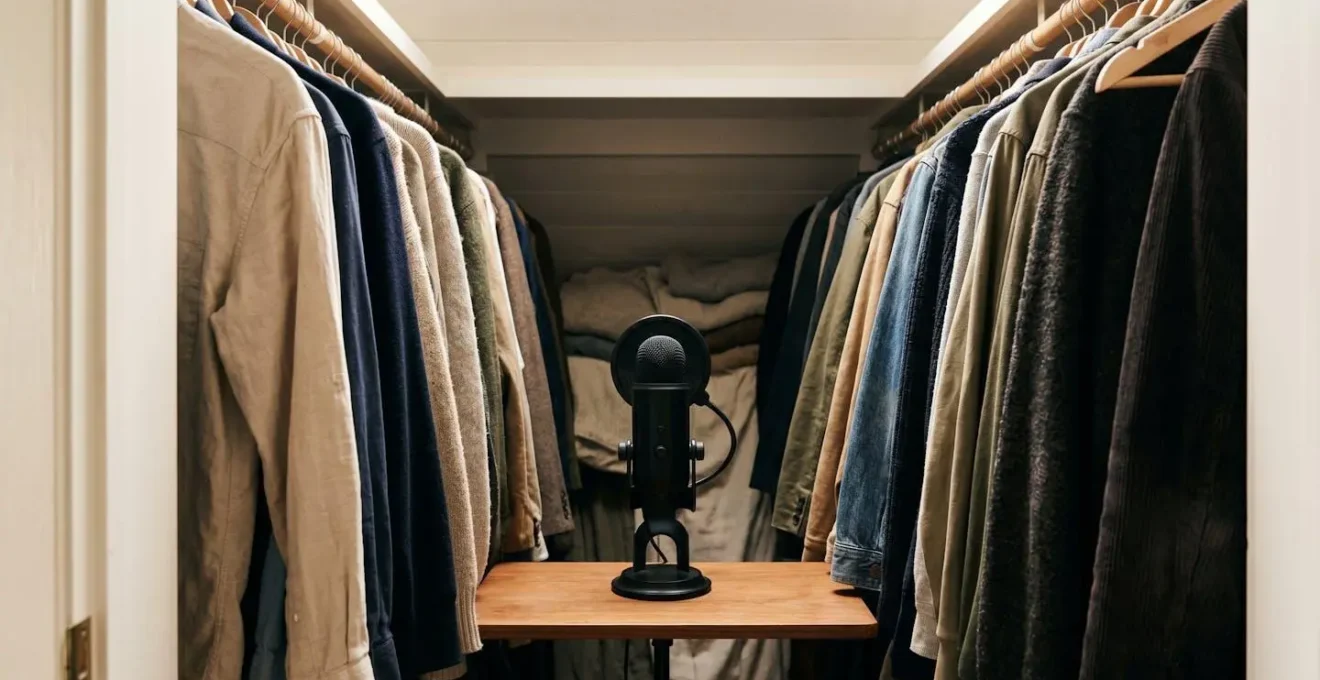
By identifying the « deades » space in your home and even building a temporary « fort » of duvets and pillows around your microphone, you can create an acoustically controlled zone. This single act of controlling the acoustic environment will do more for the clarity and professionalism of your sound than any microphone purchase ever could. You are removing the room from the equation, allowing your microphone to capture the pure, direct sound of the source.
Dynamic or Condenser: Which Microphone Type Records Your Voice Better?
The « condenser versus dynamic » debate is one of the most common in home recording, often framed as a question of which is « better. » This is the wrong question. It’s not about inherent quality; it’s about choosing the right tool for the job. Having understood the crucial role of the room, you can now make an informed, strategic choice. The primary difference between these two microphone types lies in their sensitivity and how they react to their surroundings.
A condenser microphone is designed for detail. It has a lightweight diaphragm that responds quickly to sound waves, capturing subtle nuances and high-frequency « air. » This is why they are the default choice in professional, acoustically perfect studios. However, this sensitivity is a double-edged sword. In an untreated bedroom, a condenser mic will faithfully capture not only your voice but also the hum of your computer, the traffic outside, and every single one of those nasty room reflections. It will expose every flaw in your acoustic environment.
A dynamic microphone, on the other hand, is built for isolation. Its heavier moving-coil design is less sensitive. It requires more sound pressure to get a strong signal, which means it naturally rejects quieter, off-axis sounds. It’s less effective at picking up distant room reflections and background noise. This is why dynamic mics are the standard for live performance, where isolating the vocalist from the sound of the drums and the crowd is paramount. This same principle makes them an incredibly powerful tool for the home recordist in an untreated room.
The choice is a trade-off. The following table breaks down the key characteristics to help you decide which tool is right for your specific situation, based on what we’ve now learned about the recording environment.
| Characteristic | Dynamic Microphone | Condenser Microphone |
|---|---|---|
| Sensitivity | Lower sensitivity; less effective at picking up subtle details | High sensitivity; captures subtle details and nuances |
| Room Noise Rejection | Excellent; naturally rejects background noise and reflections | Poor; picks up room flaws, HVAC noise, and reflections |
| Frequency Response | Narrower; emphasizes midrange presence | Wider; extended high-frequency detail and air |
| Ideal Environment | Untreated rooms, noisy environments, live performances | Acoustically treated studios, quiet controlled spaces |
| Phantom Power Required | No | Yes (48V) |
| Durability | Robust, road-ready, handles rough use | Fragile, requires careful handling |
| Typical Use Cases | Vocals in untreated spaces, guitar amps, drums, live sound | Studio vocals, acoustic instruments, detailed capturing |
So, which records your voice better? If you’re in a well-treated room, the condenser will capture more nuance. But if you’re in a typical bedroom, the dynamic microphone will almost always give you a cleaner, more focused, and more usable recording from the start, saving you from a world of trouble in the mix. This is why a £100 Shure SM58 (a dynamic mic) can sound more « pro » than a £500 condenser in the wrong environment. It’s not better; it’s smarter.
The Microphone Buying Mistake That Fills Your Cupboard Without Improving Your Recordings
The accessibility of recording technology has exploded. As Pro Audio Analyst James Kirby noted in a Futuresource Consulting report, the market is thriving because « an individual in their bedroom can create for a few thousand dollars what would have cost tens of thousands of dollars in the past. » This has empowered a generation of creators, but it has also fueled a pervasive and costly mistake: the belief that owning a large collection of microphones is the path to versatile, professional sound.
This leads to what many engineers call « GAS » – Gear Acquisition Syndrome. You buy a well-regarded large-diaphragm condenser, but it sounds boomy in your room. So, you buy another one, perhaps praised for its « darker » character, hoping it will fix the issue. Then you read that you need a small-diaphragm condenser for acoustic guitar, so you buy a pair of those. Before you know it, your cupboard is full of microphones, your bank account is empty, and your recordings haven’t fundamentally improved. You’ve been collecting tools without learning how to use your hammer.
The mistake is confusing *variety* with *function*. Buying five different large-diaphragm condenser microphones in the same price range gives you five slightly different flavours of the same tool. All of them will suffer from the same problems in a bad room. They will all react poorly to incorrect placement. The solution isn’t to accumulate more of the same type of tool; it’s to acquire a small, curated set of microphones that serve distinctly different functional purposes. Instead of having five similar paintbrushes, you need one for broad strokes, one for fine details, and one for a specific texture. This strategic approach ensures you have the right tool for any job, rather than a drawer full of redundant options.
Which 3 Microphones Cover 90% of Home Recording Situations?
Instead of an endless collection, a home recordist can achieve professional, versatile results by focusing on three functional archetypes. This isn’t a list of specific brands or models, but a strategic toolkit where each microphone serves a unique purpose, allowing you to tackle almost any recording scenario with the right tool. By understanding the *job* of each microphone, you can stop collecting gear and start making music. A well-rounded home studio locker is built on function, not quantity.
This approach moves you away from the « one-mic-fits-all » fallacy and equips you with a versatile palette. You’ll have a tool for isolating sources in imperfect rooms, a tool for capturing flattering detail when the acoustics are right, and a tool for translating acoustic instruments with honesty. This small, deliberate collection is infinitely more powerful than a cupboard full of similar-sounding condenser mics.
Your Essential Microphone Toolkit: The 3 Archetypes
- The Workhorse Dynamic: Its purpose is to isolate sound in untreated rooms with excellent rejection. Use this for vocals in imperfect spaces, loud guitar amps, and individual drums (snare, toms). It’s built to handle high sound pressure levels (SPL) without distortion and is your go-to problem-solver for noisy environments.
- The Detailed Large-Diaphragm Condenser: Its purpose is to capture flattering detail, nuance, and « air. » This is your main vocal mic *only when room acoustics are controlled*. It excels on acoustic guitar and piano, bringing a larger-than-life quality to the source. It requires 48V phantom power and careful handling.
- The Accurate Small-Diaphragm Condenser: Its purpose is to capture acoustic reality with honesty and precision, especially fast transients (the initial attack of a sound). Use this for detailed acoustic instruments, as drum overheads to capture the whole kit, on stringed instruments, and for creating accurate stereo images when used as a pair.
With these three functional tools, you are prepared for virtually any challenge a home studio can present. You have a robust, problem-solving dynamic for difficult sources and rooms; a detailed, flattering condenser for controlled vocal sessions; and a precise, accurate condenser for capturing the natural sound of acoustic instruments. You have moved beyond simply buying « good mics » and have started thinking like an engineer: selecting the right tool for the specific job at hand.
Why Does Adding More Microphones Make Your Drum Recording Sound Thinner?
You’ve mic’d up the entire drum kit—kick, snare, hi-hat, toms, and a pair of overheads. You have eight channels of beautiful, isolated drums. But when you push up all the faders, the powerful, punchy sound you expected is gone, replaced by a thin, « papery » sound that lacks weight and impact. This baffling and common problem is caused by phase cancellation, a fundamental concept of audio physics. When two or more microphones record the same sound source from different distances, their sound waves can arrive at the recording medium out of sync with each other.
Imagine dropping two pebbles into a still pond a short distance apart. Where the crest of one ripple meets the trough of another, the water flattens out. The same thing happens with sound waves. If the sound wave from the snare drum reaches the overhead microphone slightly later than it reaches the close snare microphone, their waveforms may be out of alignment. According to Shure’s technical documentation, when two identical signals are combined with one being delayed, the interaction between the 180 degrees out-of-sync waveforms causes them to cancel each other out, particularly affecting low-end frequencies. This is what steals the « punch » from your kick and the « body » from your snare, a phenomenon known as comb filtering.

The more microphones you add, the more potential phase relationships you create, and the higher the risk of destructive cancellation. Your multitrack recording sounds « thinner » than a simple two-mic setup because the complex interactions between the mics are literally erasing parts of the frequency spectrum. The solution lies not in using fewer mics, but in placing them with an awareness of phase coherence. A simple but effective guideline is the 3-to-1 Rule, which provides a starting point for minimising phase issues during recording.
- Identify the distance from your close microphone to its source (e.g., the snare mic is 5cm from the snare).
- Position the next closest microphone (e.g., an overhead) at least *three times* that distance away from the first microphone (i.e., 15cm away from the snare mic).
- Apply this ratio as a starting point for all microphone pairs recording the same source.
- Use your ears. Zoom in on your DAW’s waveforms and visually check if the transients are aligned. If necessary, flip the polarity (phase) on a channel to see if the low-end magically reappears.
By managing phase relationships at the source, you build a solid, coherent sonic foundation. You stop the sound waves from fighting each other and instead get them to work together, resulting in a full, punchy, and professional multitrack recording.
When Does a £2,000 Interface Sound Better Than a £200 One and When Doesn’t It?
After tackling microphones, the audio interface is the next piece of gear that home recordists obsess over. The market is filled with options, from budget-friendly £200 units to professional-grade £2,000+ racks. It’s natural to wonder if that huge price jump delivers a proportional leap in sound quality. The answer is nuanced: sometimes it does, but often, for the home user, it absolutely does not. The difference is only revealed when all other variables have been perfected.
An audio interface has two main jobs that affect sound quality: the preamplifier, which boosts the weak microphone signal, and the converter, which translates the analogue signal into digital data (and back again). In a high-end interface, these components are engineered with extreme precision. The preamps are cleaner, offering more gain with less noise, and the converters are more accurate, capturing a wider dynamic range with greater fidelity. This difference is real and measurable.
However, these improvements are like applying a high-resolution microscope. They will only reveal detail that is actually there. If the source you are feeding into the interface is flawed, the expensive interface will simply give you a more detailed and accurate recording *of that flawed sound*. If your room is untreated and full of reflections, the £2,000 interface will capture those reflections with pristine, unforgiving clarity. If your microphone placement is causing a boomy proximity effect, the expensive preamp will simply amplify that boominess with more power.
As the editorial team at Film Threat bluntly puts it, the hierarchy of sound quality is clear. Their advice for anyone setting up a home recording space is that « The room matters more than the gear. Before any serious audio engineer touches an equipment list, they think about acoustic treatment. »
This is the point of diminishing returns in action. The difference between a £200 and a £2,000 interface is only audible when you are recording in a well-treated room, with a well-placed, appropriate microphone capturing a great performance. Until you have controlled those foundational elements, the money spent on a high-end interface is largely wasted. A modern £200 interface is more than capable of producing professional-quality recordings, provided you give it a professional-quality signal to work with.
Key Takeaways
- Your microphone’s performance is dictated by technique and environment, not its price.
- Controlling room reflections with simple absorption (duvets, clothes) is more effective than buying a new mic.
- The best microphone is not the most expensive one, but the right *type* (dynamic or condenser) for your specific room.
Why Do Your Multitrack Recordings Sound Worse Than Simple Two-Track Captures?
The journey into home recording often begins with a simple setup: one microphone, one instrument, one track. As skills and gear grow, so does the complexity. Suddenly, you have access to multitrack recording, a technology that was once the exclusive domain of million-pound studios. With the home studio segment now responsible for more than half of total studio vertical revenue, more people than ever are building complex arrangements track by track. Yet, a common and disheartening problem arises: the final mix of all these individual tracks sounds cluttered, weak, and less impactful than a simple, live two-track recording of the same performance.
This happens because every track you add introduces new sonic information that must coexist with all the others. A simple acoustic guitar and vocal recording is easy to balance. But in a 24-track session, you have 24 different elements competing for a limited amount of space in the frequency spectrum. If your kick drum, bass guitar, and the low end of a piano are all dominating the same low-frequency range, they will turn to mud. If your cymbals, vocals, and synthesizers are all fighting for the same high-frequency « air, » the result will be harsh and brittle.
Furthermore, every decision made in isolation—from microphone choice to placement—is magnified in the final mix. A slightly boomy vocal (due to proximity effect) might sound fine on its own, but when combined with a bassline, it creates an undefined low-end mess. A drum recording with subtle phase issues might seem usable, but when you try to fit it into a dense mix, it will lack the punch to cut through. Multitracking doesn’t just add sounds; it multiplies complexity. The final mix is a fragile ecosystem where every element affects every other element.
The solution lies in a holistic approach. It requires applying all the principles we’ve discussed—room control, mic placement, phase coherence—to *every single track* you record. It means thinking like a producer from the very beginning, making decisions not just for how a single track sounds on its own, but for how it will serve the final song. A simple two-track recording sounds good because that balance and coherence are captured naturally in the room. In a multitrack world, it is your job as the engineer to build that coherence, piece by piece, from the ground up.
By shifting your focus from acquiring equipment to mastering these fundamental recording techniques, you empower yourself to create professional-sounding music with the gear you already own. Start applying these principles today to transform your home recordings.