Contrary to popular belief, a more expensive audio interface is not a magic bullet for better sound.
- The perceived quality of an interface depends on its synergy with your entire recording chain, including your room, microphones, and computer.
- A high-end interface will accurately capture a bad sound source, making flaws more obvious, not fixing them.
Recommendation: Instead of focusing only on price, assess your interface as the central hub of your studio, prioritising how its features solve your specific workflow problems, from latency management to future expansion.
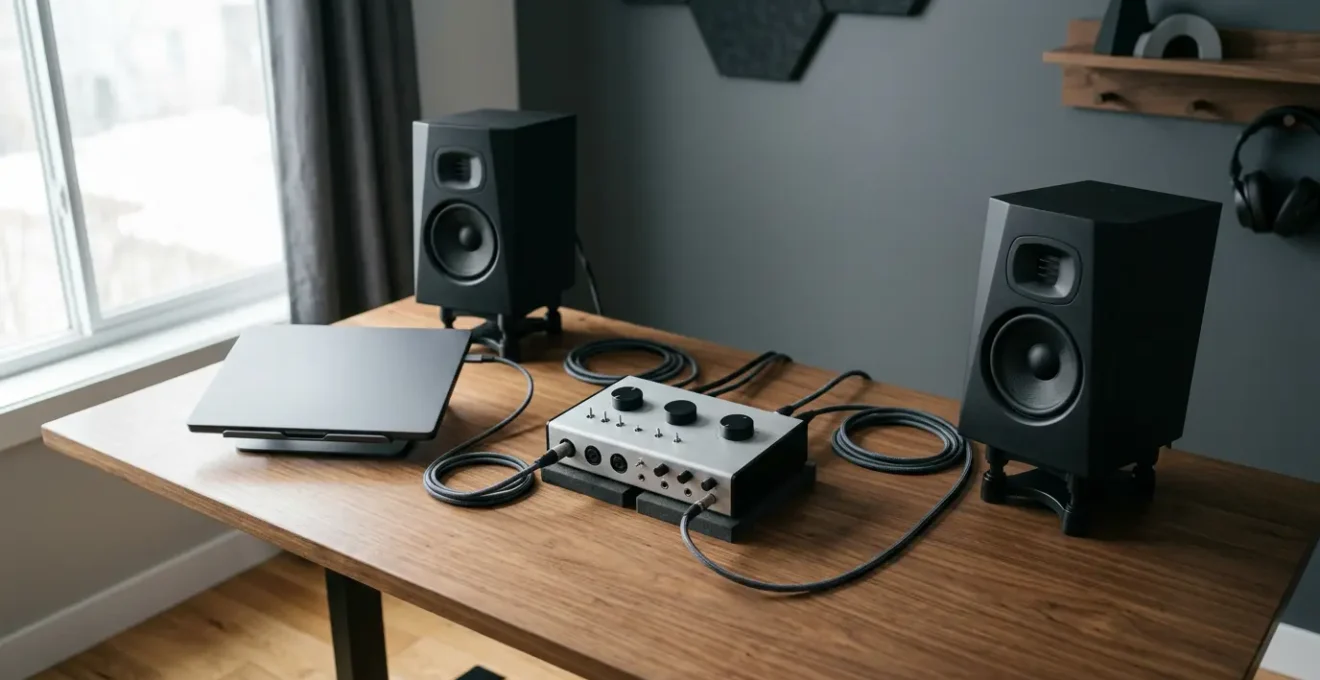
You’ve just unboxed a new audio interface. Maybe it was a significant upgrade, a step up from a budget model to a mid-tier unit promising pristine preamps and superior conversion. You plug it in, record the same vocal or guitar part you’ve recorded a hundred times, and lean in to listen. It sounds… different. But is it better? Perhaps it’s clearer but also harsher. Or maybe it’s warmer but feels less defined. This single experience opens a Pandora’s box of questions for any UK producer trying to level up their sound.
The common wisdom suggests a linear path: more money equals better sound. Forum threads and YouTube reviews are filled with discussions on A/D/A converters, clocking stability, and preamp noise floors. While these specifications are important, they represent only a fraction of the story. Focusing on them alone is like trying to understand a car’s performance by only looking at the speedometer’s maximum number. The real answer lies not in a single component, but in understanding the interface as the central nervous system of your entire recording ecosystem.
The truth is, the change you’re hearing is a complex interplay of conversion quality, latency management, driver stability, and electrical synergy with your other equipment. If the fundamental key isn’t just the price tag, but a holistic understanding of your signal chain, how do you make the right choices? How do you diagnose problems and ensure your next upgrade is a genuine step forward, not a sideways move that just exposes other weaknesses in your setup?
This guide will deconstruct the core functions of an audio interface, moving beyond marketing specifications to provide a strategic framework. We will explore when a premium interface truly makes a difference, how to manage the technical settings that kill creativity, and why sometimes, the most significant sonic change comes from moving a microphone, not from spending another £500.
Summary: Understanding Your Audio Interface’s Real Impact on Sound
- When Does a £2,000 Interface Sound Better Than a £200 One and When Doesn’t It?
- How to Set Your Buffer So You Can Record Without Hearing Delay?
- USB, Thunderbolt or Ethernet: Which Connection Serves Your Studio Best?
- The Interface Upgrade That Won’t Fix Your Recording Problems
- Which Interface Features Should You Buy for Today Versus Future Needs?
- Why Did Your New £800 Preamp Make Your Recordings Sound Worse?
- Why Does Moving Your Mic 10cm Change the Sound More Than Buying a Better One?
- Why Does Your £500 Microphone Sound Amateur While Bedroom Producers Get Radio-Ready Results With £100 Mics?
When Does a £2,000 Interface Sound Better Than a £200 One and When Doesn’t It?
The sonic difference between a budget and a premium audio interface isn’t a myth, but its importance is often misunderstood. In truth, as Audio University notes, « Even the cheapest audio interfaces today sound incredible. You can certainly make professional-quality recordings with just about any audio interface on the market. » The primary distinction lies in the quality of two key components: the microphone preamplifiers and the A/D/A (Analog-to-Digital/Digital-to-Analog) converters. Premium interfaces use higher-grade components, which translates to a lower noise floor, greater dynamic range, and more accurate frequency response. For instance, the preamps in Audient’s budget-friendly iD4 interface are the same design as those found in their high-end recording consoles, which, according to technical specifications reviewed by audio engineers, can cost upwards of £40,000.
This is where the concept of the point of diminishing returns becomes crucial. A £2,000 interface sounds demonstrably better than a £200 one when the rest of your recording chain can resolve that extra detail. If you are recording with a high-quality microphone in an acoustically treated room, the superior preamps and converters will capture a more nuanced, detailed, and three-dimensional sound. The lower noise floor will be apparent in quiet passages, and the extended dynamic range will handle loud sources with less distortion.
However, the opposite is also true. If you are recording in an untreated bedroom with a mediocre microphone, a premium interface will simply give you a more faithful, high-resolution recording of a flawed sound source. The subtle ringing of your plasterboard walls and the hum of your laptop fan will be captured with pristine clarity. In this scenario, the £1,800 price difference offers negligible benefit. The interface upgrade only provides a tangible return on investment when it is no longer the weakest link in your signal chain.
How to Set Your Buffer So You Can Record Without Hearing Delay?
To record without hearing a distracting echo, you should set your buffer size as low as your computer can handle, typically between 128 and 256 samples. Latency—the delay between playing a note and hearing it back through your monitors—is a direct result of the time it takes your computer to process audio. The buffer is a small chunk of memory where audio data is temporarily stored. A smaller buffer means less delay but requires more CPU power, while a larger buffer eases the load on your computer at the cost of increased latency.
Thinking of this as a « latency budget » is a more strategic approach. You don’t need the lowest possible latency for every task. The most efficient workflow involves two distinct modes. During the tracking or recording phase, latency is the enemy. It can throw off a performer’s timing and feel completely unnatural. This is when you « spend » your CPU power on a low buffer. For a typical home studio setup, according to Sweetwater’s technical documentation, a setting of 128 to 256 samples at a 48kHz sample rate is the ideal starting point. If your computer struggles with clicks and pops, your first line of defense is to close other applications, freeze tracks with heavy plugins, or slightly increase the buffer to 512.
Conversely, during the mixing and production phase, audible latency is irrelevant. You are no longer recording live input, so a delay of a few extra milliseconds is unnoticeable. In this mode, you want to « save » your CPU power to run demanding plugins like reverbs, amp simulators, and virtual instruments. Increasing your buffer size to its maximum setting (often 1024 or 2048 samples) gives your computer the breathing room it needs to handle a heavy processing load without crackling or crashing. Many modern interfaces also offer « direct monitoring, » which sends the input signal directly to your headphones before it even reaches the computer, providing true zero-latency monitoring and bypassing the buffer size issue entirely during recording.
Your Action Plan: The Two-Mode Latency Workflow
- Assess Your Task: Before starting a session, determine if you are tracking (recording live audio) or mixing (working with existing audio).
- Engage Tracking Mode: For recording, set your DAW’s buffer size to 128 samples. If your computer struggles, use your interface’s direct monitoring feature to bypass computer latency completely.
- Switch to Mixing Mode: Once tracking is complete, increase the buffer size to the maximum setting (e.g., 1024 samples) to free up CPU resources for plugins and virtual instruments.
- Troubleshoot Pops & Clicks: If you experience audio dropouts at a low buffer, close unnecessary applications or ‘freeze’ tracks in your DAW before increasing the buffer size.
- Check Sample Rate: Remember that latency is also affected by sample rate; a higher sample rate (e.g., 96kHz) results in lower latency at the same buffer size, but also places a higher demand on your CPU. Stick to 48kHz for a good balance.
USB, Thunderbolt or Ethernet: Which Connection Serves Your Studio Best?
The debate between USB, Thunderbolt, and Ethernet often revolves around one metric: bandwidth. While Thunderbolt 3/4 boasts a staggering 40 Gbps compared to USB 2.0’s 480 Mbps, this is largely irrelevant for the vast majority of home and project studios. Bandwidth determines how many channels of audio can be transferred simultaneously. To put it in perspective, technical analysis shows that recording 40 channels of 24-bit/48kHz audio requires only about 46 Mbps, as demonstrated by RME’s technical specifications. This means a decades-old USB 2.0 connection has more than enough bandwidth to handle most multitrack recording sessions.
The more critical factor for a recording musician is latency. This is where the connection protocol and, more importantly, the quality of the manufacturer’s drivers, make a difference. Thunderbolt has a more direct connection to the computer’s PCIe system, which can result in slightly lower round-trip latency. This is a real advantage for producers who rely heavily on virtual instruments or who track through plugins in real-time. Ethernet-based protocols like Dante and AVB are designed for scalability in large, multi-room facilities and offer robust networking capabilities, but often at the cost of higher base latency and complexity compared to a direct connection.
The following table, based on an analysis of connection protocols, provides a clear overview to help you choose the right connection for your specific needs.
| Protocol | Bandwidth | Typical Latency | Compatibility | Best Use Case |
|---|---|---|---|---|
| USB 2.0 | 480 Mbps | 2.7-5.8ms | Universal (Mac/PC) | Portability, 2-16 channel recording |
| USB 3.0/3.1 | 5-10 Gbps | 2-4ms | Widespread (Mac/PC) | High channel count, future-proofing |
| Thunderbolt 3/4 | 40 Gbps | 1.67-2.5ms | Mac standard, limited PC | Low latency, plugin-heavy workflows |
| Ethernet (Dante/AVB) | 1-10 Gbps | Varies | Networked systems | Multi-room facilities, scalability |
Ultimately, for most producers, a well-implemented USB interface from a reputable brand with stable drivers will perform flawlessly. The choice to invest in Thunderbolt should be driven by a specific need for the lowest possible latency for real-time processing, not by a perceived need for more bandwidth.
The Interface Upgrade That Won’t Fix Your Recording Problems
There is a pervasive myth in audio production that a new piece of gear will magically solve underlying recording issues. This is especially true of audio interfaces. Producers often invest in a high-end unit expecting it to fix a muddy vocal or a thin-sounding guitar, only to be disappointed. The problem lies in a fundamental misunderstanding of what an interface does. It is not a creative effect; it is a tool of measurement and translation.
The most accurate way to conceptualise this is through an analogy. A high-quality audio interface does not behave like a creative filter in Photoshop; it behaves like a high-resolution camera lens. A cheap, plastic lens might produce a soft, blurry, or distorted image. An expensive, professional-grade lens will capture reality with unflinching accuracy—every pore, every stray hair, every imperfection. The lens doesn’t make the subject more beautiful; it simply reveals the subject with greater fidelity.
An interface is a camera, not a Photoshop filter. It will only capture your sound source and your room with higher fidelity.
– Editorial concept, Audio production thought leadership
If your recordings sound amateurish, a premium interface will often make them sound *more* amateurish, just in high definition. It will faithfully capture the poor acoustics of your untreated room, the imprecise timing of your performance, and the tonal imbalances caused by poor microphone placement. The fidelity ceiling is raised, meaning the potential for quality is higher, but so is the potential to expose flaws. A £2,000 interface will not fix a vocal recorded with a cheap microphone in a bathroom. It will simply give you a crystal-clear recording of a vocal sung in a bathroom.
Which Interface Features Should You Buy for Today Versus Future Needs?
Choosing an audio interface is a balancing act between your immediate recording needs and your long-term studio ambitions. It’s easy to be tempted by a long list of features, but overspending on capabilities you’ll never use is a common pitfall. A « Now vs. Next » framework helps you prioritise your investment, ensuring you spend money on what improves your sound today while leaving a clear upgrade path for tomorrow.
For your « Now » needs, focus on the core components that directly impact the quality of every recording. The number one priority should be the quality of the preamps and converters. Ensure you have enough inputs for your current projects—two high-quality inputs are more valuable than eight mediocre ones if you only ever record vocals and guitar. The second priority is the headphone amplifier. It must have enough power to drive your specific monitoring headphones to an adequate volume without distortion; a weak headphone amp can make accurate mixing impossible.
For your « Next » needs, look for features that facilitate expansion without forcing you to replace the entire unit. The most important of these is ADAT I/O. An ADAT Lightpipe connection allows you to connect an external 8-channel preamp/converter, instantly expanding your input count when you’re ready to record a full drum kit or a band. Other future-proofing features include Word Clock I/O for syncing multiple digital devices and DSP-powered monitoring, which allows you to apply effects like reverb to a vocalist’s headphones during tracking without adding latency or taxing your computer’s CPU. By separating your needs into these two categories, you can make a smarter, more scalable investment.
Action Plan: Auditing Your Interface Needs
- Points of Contact: List all the features you need right now (e.g., 2 pristine preamps, 1 instrument input, powerful headphone out) versus what you might need in the future (e.g., 8+ inputs for drums, multiple headphone mixes).
- Collecte: Inventory your current microphones and headphones. Check their specifications (e.g., ribbon mic impedance, headphone impedance in Ohms) to ensure your chosen interface’s preamps and headphone amp are a good technical match.
- Cohérence: Confront the interface’s features with your long-term creative goals. If you plan to build a large, multi-device studio, look for Word Clock. If you value a simple, flexible workflow, avoid interfaces that lock you into a specific brand’s DSP plugin ecosystem.
- Mémorabilité/Émotion: Honestly assess which ‘Next’ features are genuine future requirements versus just symptoms of ‘Gear Acquisition Syndrome’. Do you have a concrete plan to record a full band that justifies ADAT, or is it just a ‘nice to have’?
- Plan d’Intégration: Prioritise your budget on the ‘Now’ features that deliver immediate quality (preamp and converter quality). Create a clear, staged plan for how ‘Next’ features like ADAT will be integrated when the need arises.
Why Did Your New £800 Preamp Make Your Recordings Sound Worse?
It’s one of the most confusing and frustrating experiences for a home producer: you save up, invest in a high-quality external preamp or a premium interface, and your recordings suddenly sound thin, harsh, or just plain *worse*. The culprit is rarely the new gear itself but an issue of system synergy. A recording chain is only as strong as its weakest or, more accurately, its most mismatched link. One of the most common yet misunderstood examples of this is impedance mismatch.
Microphone preamps have a specification called « input impedance, » measured in Ohms (Ω). Different microphones are designed to work optimally with different impedance loads. For example, many modern condenser mics are flexible, but passive ribbon microphones are notoriously sensitive to impedance. Connecting a classic ribbon mic to a preamp with the ‘wrong’ input impedance can dramatically alter its frequency response, often resulting in a significant loss of low-end warmth and an unpleasantly exaggerated top-end. A famous case study in the audio community involves users upgrading from a budget interface to a premium preamp for their ribbon mics. They found the sound became thin and brittle. The issue wasn’t the £800 preamp’s quality; it was that the budget interface’s low 1.2kΩ impedance was, by pure chance, a better match for that specific mic than the new preamp’s ‘standard’ 2.4kΩ impedance.
Beyond impedance, another critical factor is gain staging. A premium preamp offers more clean gain, but it also has an optimal operating range or « sweet spot. » Pushing the gain too hard can introduce noise and distortion, while setting it too low forces you to boost the signal later in the mix, raising the noise floor. Your old, cheaper interface may have had a very limited usable range that you learned to work within. The new, more powerful preamp offers a much wider, more sensitive control, requiring a more refined technique to find its optimal level. Your new gear isn’t worse; it’s simply less forgiving and demands a higher level of user skill to unlock its potential.
Why Does Moving Your Mic 10cm Change the Sound More Than Buying a Better One?
The single most powerful and overlooked tool in any recording engineer’s arsenal is microphone placement. Moving a microphone by just a few centimetres can have a more profound impact on the final sound than swapping a £200 mic for a £2,000 one. This isn’t an opinion; it’s a principle rooted in physics, primarily governed by the Inverse Square Law and the proximity effect.
The Inverse Square Law dictates how sound level changes with distance. In a perfect open space, every time you double the distance from a sound source, the sound pressure level drops by 6 decibels (dB). In a typical recording room, this effect is slightly lessened by reflections, but the principle holds. As documented in acoustic engineering principles from Biamp, you can expect a 4.5-5dB reduction per doubling of distance in enclosed spaces. This means a small change in distance creates a huge change in the ratio of direct sound (from the source) to reflected sound (from the room). Moving a mic closer to a vocalist makes the vocal more direct, intimate, and dry. Moving it further away brings in more of the room’s ambience and natural reverb, making it sound more distant and spacious.
Additionally, directional microphones (like cardioid mics, which are common for vocals) exhibit the proximity effect. As the mic gets closer to the source (typically within 30cm), the low-frequency response is boosted significantly. This is what gives radio presenters their deep, booming voice. A 5cm move towards the mic can add a huge amount of bass, while a 5cm move away can thin the sound out considerably. Skilled engineers use this effect creatively, adjusting the mic-to-source distance to dial in the perfect amount of low-end warmth without ever touching an EQ knob. No interface or microphone upgrade can replicate these fundamental acoustic changes. Mastering mic placement gives you control over tone, ambience, and dynamics at the source—the most critical stage of recording.
Key Takeaways
- An expensive interface offers better components, but its benefits are only realised when your microphone and room acoustics are of a similar high standard.
- Manage latency strategically by using a low buffer size for tracking (recording) and a high buffer size for mixing to balance performance and CPU load.
- The quality of your recordings is determined by the entire ecosystem; a high-end interface cannot fix a poor performance, bad mic placement, or an untreated room.
Why Does Your £500 Microphone Sound Amateur While Bedroom Producers Get Radio-Ready Results With £100 Mics?
It’s a common source of frustration: you’ve invested in a reputable £500 microphone, yet your raw recordings sound flat and lifeless compared to the polished, « radio-ready » tracks coming from bedroom producers using £100 setups. The secret isn’t in the hardware; it’s in the understanding that a raw recording is merely the starting point, not the final product. The difference lies in technique and processing—the « post-production » that turns a good capture into a great sound.
Producers achieving professional results with budget gear have mastered the recording ecosystem. They understand that the process starts before the microphone is even switched on, with basic room treatment (like duvets and bookshelves) to minimise bad reflections. They use disciplined microphone technique to control dynamics and tone at the source. But most importantly, they are fearless and skilled in their use of processing. A « radio-ready » vocal is rarely a single, unprocessed track. It is a carefully constructed composite of subtractive EQ to remove muddy frequencies, multi-band compression to control dynamics across the frequency spectrum, saturation to add harmonic richness, and precisely applied reverb and delay to create space and depth.
A successful case study is the proliferation of hits made with gear like the M-Audio M-Track Solo, an interface costing less than £50. The key to its success isn’t its modest 16-bit/48kHz hardware, but the ecosystem it’s a part of. Users combine it with the bundled software, including powerful Avid plugins, and apply aggressive but tasteful processing to shape the raw sound. They treat the initial recording as raw clay, to be sculpted to fit perfectly within the context of the full mix. Your £500 mic is likely capturing a far more detailed and accurate signal, but without the subsequent sculpting, it remains a block of unshaped, high-quality clay.
By now, it should be clear that the quality of your audio interface is just one piece of a much larger puzzle. To achieve truly professional recordings, your focus must shift from chasing individual specifications to cultivating a holistic understanding of your entire studio ecosystem. Evaluate every link in your chain—from the room you record in to the plugins you use—and identify the weakest link. That is where your next investment of time, learning, or money will yield the greatest return.