The solution to robotic beats isn’t the random « humanize » function; it’s programming with the mindset and signature style of a real drummer.
- True groove comes from applying *intentional, consistent imperfections* to your patterns, not from random velocity and timing.
- Different genres require specific micro-timing signatures (e.g., late snares in Funk, shuffled hats in House) that define their feel.
- Making separate samples sound cohesive requires « acoustic glue »—shared processing like reverb and compression to simulate a real room.
Recommendation: Stop editing on a grid with your eyes. Start programming with your ears by embodying a « virtual drummer » with a distinct, repeatable personality in your DAW.
You’ve likely spent hours in your home studio, meticulously programming a beat. You’ve picked the perfect samples, the pattern is complex, but when you play it back, something is fundamentally wrong. It sounds rigid, lifeless, mechanical. Meanwhile, you listen to professional productions, and their programmed drums feel alive, they breathe, they have that undeniable quality we call « groove. » This is a common frustration for many UK producers who feel their tracks lack the professional polish that makes people move.
The standard advice is often a list of simple tweaks: « vary your velocities, » « nudge some notes off the grid, » or « apply a swing template. » While these are parts of the puzzle, they are often treated like random salt and pepper, sprinkled on top in the hope of adding flavour. This approach rarely works because it misses the core principle. The problem isn’t a lack of variation; it’s a lack of *intention* behind that variation.
But what if the secret wasn’t about using a « humanize » button to add randomness, but about doing the opposite? What if the key was to create a *consistent* and *musical* personality for your drums? This guide will shift your perspective from that of a programmer arranging blocks on a grid to that of a performance director, shaping the unique character of a « virtual drummer. » We will explore how to stop randomising and start embodying, turning mechanical patterns into infectious grooves by understanding the physical and musical logic behind a real drummer’s performance.
This article breaks down the essential techniques for programming beats with a human feel. We’ll move from the foundational problems of grid-based quantisation to advanced strategies for creating dynamic, evolving drum parts that serve the song.
Summary: From Mechanical to Musical: A Drum Programming Masterclass
- Why Does Quantising Your Drums to the Grid Make Them Sound Worse?
- How to Make Hi-Hats Sound Like a Human Played Them Instead of a Robot?
- TR-808 or TR-909: Which Machine Suits Your Hip-Hop Production Better?
- The Programming Mistake of Perfect Loops That Bore After 30 Seconds
- When Should Drum Patterns Change for Optimal Section Transitions?
- Why Does Moving Notes Off the Grid Make Your Beat Sound Better?
- Why Does Adding More Microphones Make Your Drum Recording Sound Thinner?
- Why Do Your Programmed Grooves Sound Like a Robot Despite Using Real Drum Samples?
Why Does Quantising Your Drums to the Grid Make Them Sound Worse?
Quantising—the process of snapping every note to the nearest perfect rhythmic division on your DAW’s grid—is the number one culprit behind robotic-sounding drums. It enforces a level of mathematical perfection that no human drummer could ever achieve or would even want to. While it ensures your beat is « in time, » it strips away the subtle, organic push and pull that defines a groove. This mechanical precision creates a static, predictable rhythm that lacks the energy and feel of a live performance.
A human drummer’s timing is a living thing. It breathes with the music, naturally deviating from the metronomic grid in ways that create rhythmic tension and release. These tiny, millisecond-level variations are what we perceive as « feel » or « pocket. » When every hit lands with flawless accuracy, the beat becomes sterile. A 2013 study on groove perception highlighted this paradox: while listeners often rate rhythmically perfect versions highly for « tightness, » the research also confirmed that time differences of only a few milliseconds are critical for the physical experience of groove.
This doesn’t mean you should abandon the grid entirely. Instead, think of it as a reference, not a rule. The goal is to introduce intentional imperfections. Using swing is a primary way to do this, but it’s not about applying a generic template. It’s about finding the right amount of shuffle to create a specific feel. For example, in House music, the signature groove often comes from a specific shuffle amount. Instead of just being « on » or « off, » the feel is precisely controlled. True groove lies in that controlled space between perfect rigidity and total chaos.
How to Make Hi-Hats Sound Like a Human Played Them Instead of a Robot?
Hi-hats are often the most telling sign of a programmed beat. A real drummer’s hi-hat pattern is a fluid, dynamic performance, not a series of identical sounds repeated at a fixed volume. To escape the « robot trap, » you must practice kinetic emulation—programming your hi-hats to mimic the physical movements and energy of a drummer’s hand. This involves manipulating three key elements: timbre, duration, and micro-timing.
Firstly, no two hits are ever exactly the same. A drummer naturally varies the pressure and position of their stick, creating subtle changes in sound. You can replicate this by using multiple hi-hat samples—closed, slightly open, and fully open—and varying the velocity of each hit. Don’t just randomize it; create a musical pattern. For example, accent the downbeats (1, 2, 3, 4) with a slightly higher velocity and a « tighter » sample, while making the off-beats (the « and »s) softer and perhaps with a slightly looser sample. This creates a natural pulse.

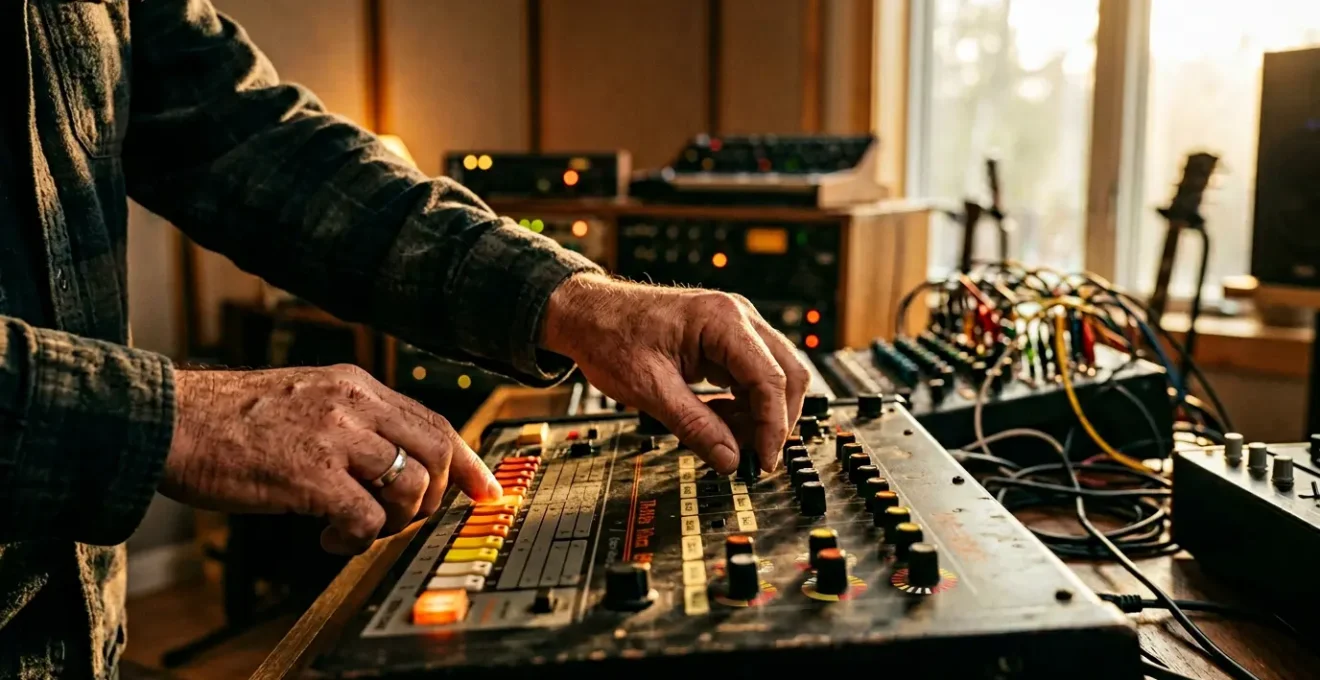
As the image above suggests, even a simple surface contains infinite possibilities for pressure and touch. This same principle applies to duration. A drummer controls how long a hi-hat « sizzles » by opening or closing the pedal. You can simulate this using your sample’s decay or release envelope. Tighter, shorter notes create tension, while longer, more open notes create release. Finally, add ghost notes—very quiet hits in between the main beats—to simulate the continuous motion of the drummer’s hand. These near-silent notes fill the gaps and make the pattern feel like a continuous performance rather than a series of isolated events.
Your Action Plan for Lifelike Hi-Hats
- Timbre Variation: Assign at least three different hi-hat samples (e.g., tight-closed, mid-closed, slightly-open) and alternate them based on musical accent, not randomness.
- Velocity Logic: Program a velocity pattern that follows musical logic. Make downbeats stronger and syncopated notes or ghost notes significantly quieter to create a clear rhythmic pulse.
- Duration Control: Use your sampler’s decay/release envelope (or a gate) to make louder, accented notes ring out slightly longer and quieter notes shorter and tighter.
- Micro-Timing Placement: Manually nudge some off-beat hi-hats slightly before or after the grid line (1-10ms) to create a subtle, human shuffle. Keep the downbeats mostly on the grid for anchor.
- Inter-Instrument Influence: Program a slight, almost imperceptible dip in hi-hat velocity on the same beat as a loud snare hit to simulate a real drummer’s momentary shift in limb focus.
TR-808 or TR-909: Which Machine Suits Your Hip-Hop Production Better?
In the world of hip-hop production, the Roland TR-808 and TR-909 are more than just drum machines; they are foundational instruments that define entire sub-genres. Choosing between them isn’t a matter of which is « better, » but of understanding their unique sonic DNA and the specific role you need them to play in your track. Your decision will fundamentally shape the groove and texture of your beat, so it’s crucial to know their distinct characters.
The TR-808 is defined by its deep, boomy, all-analog kick drum. Its long sine-wave decay allows it to function as both a percussive element and a melodic bassline, a characteristic that became the backbone of Trap and modern 808-driven hip-hop. Its other sounds, like the snappy clave and sizzly hi-hats, are iconic but it’s the kick that producers turn to for sub-bass foundation. The 808 kick is often tuned to the key of the track, becoming a core harmonic element.
The TR-909, by contrast, is a hybrid machine. While its kick and snare are analog, its hi-hats and cymbals are low-bitrate digital samples. This gives it a punchier, more aggressive character. The 909 kick has a sharp, mid-range attack and a shorter decay, designed to cut through a dense mix rather than provide a melodic bass foundation. It was the driving force behind House and Techno, but its punchy character also made it a staple in boom-bap and golden age hip-hop, often layered with other samples for weight. Its sampled hi-hats are famously crisp and metallic, offering a different kind of energy than the 808’s synthesized fizz.
This table breaks down their essential differences for a hip-hop context:
| Feature | TR-808 | TR-909 |
|---|---|---|
| Synthesis Type | All analog synthesis | Hybrid: analog synthesis + digital samples (cymbals/hi-hats) |
| Kick Drum Character | Boomy, deep, long sine-wave decay – functions as tuned melodic bassline | Punchy, aggressive mids, short decay – purely percussive driving function |
| Primary Genre Association | Trap, Miami Bass, 808-driven hip-hop, melodic sub-bass tracks | House, techno, boom-bap hip-hop, golden age production |
| Tunability | Kick drum is tunable and used as melodic element in modern production | Kick serves percussive function, cuts through mix without melodic role |
| Processing Character | Does not take to heavy processing well, typically used dry or lightly compressed | Processes well, can be layered and heavily manipulated |
| Hi-Hat Sound | Synthesized, sizzly, slightly metallic unnatural tone | Low bit-depth samples, punchy, metallic, recognizable sample character |
| Modern Usage | Often used for sub-bass foundation and 808-style kick basslines | Preferred for punchy hi-hats, snappy snares, layered with 808 kicks |
The Programming Mistake of Perfect Loops That Bore After 30 Seconds
You’ve programmed a great two-bar or four-bar loop. It has velocity changes, some swing, and feels good on its own. But when you loop it for the duration of a verse, it quickly becomes monotonous and predictable. This is the mistake of focusing only on micro-dynamics (the beat-to-beat variations) while ignoring macro-dynamics (the evolution of the pattern over a longer phrase). A real drummer doesn’t just play a loop; they play a section of a song, subtly altering the energy to build and release tension.
To solve this, think in 8 or 16-bar phrases. One of the most effective techniques is call and response programming. Instead of having the same fill or variation at the end of every fourth bar, create a musical conversation. Program a small rhythmic « question » at the end of bar 4 (e.g., a simple two-shot snare fill). Then, at the end of bar 8, program a more definitive « answer » (e.g., a more complex fill or a cymbal crash). This creates a sense of forward momentum and musical intention, making the loop feel like a structured performance.
Another powerful macro-dynamic technique is textural layering. Your core kick-snare pattern can remain consistent to maintain the groove’s foundation, but you can add and subtract subtle percussion elements over the 8-bar phrase. For instance, a shaker or tambourine could enter only for the second half of the phrase (bars 5-8), adding a lift in energy as the section progresses. You can also use automation to create a sense of breathing. A very slow, subtle automation of a filter’s cutoff frequency or a reverb send across the entire 16-bar section can make the loop feel like it’s opening up and closing down, preventing it from sounding static.
When Should Drum Patterns Change for Optimal Section Transitions?
In a real song, drums are the primary signaller of structural change. They tell the listener when a new section—like a verse, chorus, or bridge—is beginning. A common mistake in programmed music is having the drum beat change too drastically or not at all. The key is to make changes that are both noticeable enough to signal a transition and consistent enough to maintain the overall groove. The « when » is always at the boundary between song sections, and the « how » is about managing energy.
The most common and effective transition device is the drum fill. A fill is a short, improvisational-sounding pattern that breaks the main groove, typically occurring in the last bar (or last half-bar) before a new section begins. Its purpose is to build tension and release it at the downbeat of the new section. For example, leading into a high-energy chorus, you might program a fast 16th-note snare roll. Conversely, to move from a chorus back to a verse, a simpler, sparser fill might be more appropriate to lower the energy.
Beyond fills, you can use individual drum elements to signal change. The most powerful of these are the cymbals. A cymbal crash placed on the downbeat of a new section is the ultimate energy exclamation mark. It definitively announces « we are here. » The hi-hat is another key tool. A common technique is to switch from a closed hi-hat pattern in the verse to a more energetic open hi-hat or a ride cymbal pattern in the chorus. This instantly lifts the track’s energy level. Even just opening the hi-hat on the last beat before the chorus can create a « swoosh » effect that builds anticipation beautifully.
Why Does Moving Notes Off the Grid Make Your Beat Sound Better?
Moving notes off the grid makes a beat sound better because it introduces the specific, human-like timing deviations that define « groove. » However, the secret isn’t random nudging. The magic lies in creating a consistent micro-timing signature. This is the unique rhythmic DNA of a groove, where certain beats are consistently pushed or pulled from the grid in a way that creates a specific feel. Pro producers don’t just « humanize »; they dial in very precise timing characteristics that are genre-specific.
For example, the classic « laid-back » feel of Funk and Neo-Soul is often achieved by placing the snare drum hit slightly *after* the beat. This delay can be anywhere from 15-40ms, creating a sense of weight and relaxation in the groove. It’s not random; the snare is consistently late on beats 2 and 4 throughout the song. Conversely, some up-tempo electronic genres might have claps that hit a few milliseconds *before* the beat to create a feeling of urgency. According to some research on EDM production techniques, the signature shuffle of classic House music is achieved with a precise swing setting, which is a systematic delay of every second 16th-note.

Instead of randomly nudging notes, start with a clear intention. Do you want the beat to feel lazy, urgent, or bouncy? Here’s a quick map:
- Funk/Neo-Soul: Program your snare to land 15-25ms *late*. This creates the classic « pocket. »
- Classic House: Use a 55-60% swing setting on your 16th-note hi-hats for that signature shuffle.
- J Dilla-style « Drunk » Feel: Experiment with pushing kicks and snares up to 40ms late, but keep the hi-hats relatively straight to anchor the beat.
A good starting point for adding feel without losing tightness is to apply very subtle quantisation. Instead of 100%, many professional producers recommend applying 90-95% quantization. This tightens up the performance while preserving the most important micro-timing variations you played in. It’s the best of both worlds: structure and feel.
Why Does Adding More Microphones Make Your Drum Recording Sound Thinner?
In acoustic drum recording, adding more microphones can paradoxically make the overall sound thinner due to a phenomenon called phase cancellation. When a sound source (like a snare drum) is picked up by two or more microphones at slightly different distances, their sound waves can arrive out of sync. If the peak of one wave aligns with the trough of another, they cancel each other out, resulting in a thin, weak sound, particularly in the low frequencies.
This exact problem has a direct equivalent in the world of programmed drums: layering samples. Producers often layer multiple kick samples—for instance, a « sub » sample for low-end weight, a « thump » sample for body, and a « click » sample for attack. While the intention is to create a powerful, complex sound, if the waveforms of these samples are out of phase, they will fight each other. The result is a kick that sounds weaker and thinner than any of the individual samples on their own. You’re adding more elements but getting less impact.
Case Study: Fixing Phase Issues in Layered Samples with « Acoustic Glue »
The solution to phasey, thin-sounding layered drums is to treat them not as separate digital files, but as components of a single instrument. First, visually inspect the waveforms of your layered samples in your DAW. Zoom in and ensure their initial transients are aligned. If one starts with a positive peak while another starts with a negative trough, flip the polarity (phase) of one of them. The more crucial step, however, is creating « acoustic glue » to make them sound cohesive. As production experts at iZotope explain, this is done with shared processing. Instead of putting a different reverb on each drum, send all your drum samples to a single, shared short reverb or room simulation bus. This acts as a « virtual room, » placing all the disparate sounds in the same acoustic space. Similarly, processing the entire drum group through a single bus compressor and saturator helps « gel » the sounds together, simulating how the energy from a real kick would physically resonate through the entire kit.
By managing phase alignment and using shared bus processing, you ensure that layering samples adds power and complexity, rather than creating a thin, phasey mess. You are effectively recreating the cohesive energy of a single drum kit in a single room.
Key Takeaways
- Embody, Don’t Randomize: The best grooves come from programming with the consistent, intentional personality of a virtual drummer, not from applying random « humanize » functions.
- Intentional Imperfection is Key: Don’t just move notes off the grid. Learn the specific micro-timing signatures of your genre (e.g., late snares, shuffled hats) and apply them consistently.
- Use « Acoustic Glue »: Make separate drum samples sound like a unified kit by processing them through a shared reverb and compressor bus to create a cohesive acoustic space.
Why Do Your Programmed Grooves Sound Like a Robot Despite Using Real Drum Samples?
Using high-quality, « real » drum samples is a great start, but it doesn’t automatically guarantee a human-sounding groove. This is because the problem isn’t usually the sound itself, but the *performance*. A real drummer is a complex system of muscle, bone, and brain, and as the zZounds Music Blog notes, it’s a system built on nuance. As they put it:
Velocity, timing, pitch, and note duration are all things a normal drummer adjusts while playing without even thinking about it. It’s physically impossible for a human drummer to sit behind the kit and play the exact same note, at the exact same time, with the same pitch.
– zZounds Music Blog, How to Make Your MIDI Drums Sound Human
Your DAW, however, is designed for perfection. When you copy and paste a MIDI clip, you are creating a performance that is, by definition, physically impossible. This is why even the best samples can sound robotic. The solution is to move beyond simply varying velocity and timing and embrace a deeper philosophy of intentional imperfection.
Instead of using generic humanize functions that apply random variations, create a virtual drummer personality. Decide on your drummer’s unique tendencies. Is their kick foot consistently a little lazy and behind the beat? Does their snare hand rush slightly? Program these signature flaws *consistently* throughout your track. This creates a unique and repeatable groove that feels human because it has a distinct character, not because it’s random.
A final, crucial step is to address the unnatural digital silence between hits. Real drum samples are often recorded close-mic’d and in a dry room, resulting in perfect silence between notes—something that never happens in reality. To fix this, create a track with a very low-volume loop of « room tone » or studio noise floor. This « missing air » fills the digital void and provides a constant, subliminal bed for your drums to sit in, making the entire performance feel more grounded and authentic. Ultimately, the best advice is to shift your workflow: close your eyes, turn away from the grid, and tap out the beat on a MIDI controller. Trust your ears and your feel, then go back and refine, preserving the human essence you just captured.
The next step is to open your DAW, load your favourite drum samples, and start programming not a pattern, but a personality. Experiment with these concepts on your next track and listen as your beats begin to breathe and groove like never before.