The true cost of analog gear isn’t the price tag; it’s the hidden system of maintenance, required knowledge, and the powerful psychological biases it exploits.
- Expensive individual components do not guarantee better sound; system synergy and room acoustics are far more critical.
- Cognitive biases, like confirmation bias, often make us *believe* expensive gear sounds better, even when objective reality shows otherwise.
Recommendation: Instead of chasing expensive hardware, focus first on mastering your existing tools, treating your room, and only then making targeted investments in specific analog « flavours » for maximum impact.
For any producer, especially one in the UK considering a serious investment, the allure of vintage analog gear is powerful. It’s the promise of a sound that’s richer, more « alive, » and steeped in the legacy of classic records. We see the glowing tubes and chunky VU meters and imagine our music finally attaining that professional sheen. We’re told that analog adds « warmth » and « character » that digital plugins can only feebly imitate. The prevailing wisdom suggests a simple equation: more money spent on iconic, heavy hardware equals a better sound.
But what if that equation is fundamentally flawed? Many producers pour thousands of pounds into a single vintage compressor or a revered preamp, only to find their tracks still sound amateurish, sometimes even worse than when they were working entirely « in-the-box. » The frustration is palpable. The promised magic fails to materialize, leaving only a lighter bank account and a heavier dose of confusion.
The truth is far more complex and fascinating than a simple « analog vs. digital » debate. The perceived value and sonic quality of audio equipment is a complex interplay of verifiable physics, market economics, and powerful, often-unseen psychological forces. The key to a professional sound isn’t found in owning the most expensive individual components. It lies in understanding and mastering the entire *system*—the technical signal chain, the financial reality of ownership, and the cognitive biases that shape our hearing.
This article will deconstruct the myth of analog superiority. We will explore the tangible physics behind « warmth, » calculate the true cost of maintaining vintage legends, and expose the psychological traps that lead to poor investment decisions. By the end, you’ll understand why a cheap setup can outperform an expensive one and know how to spend your money for what truly matters: better music.
To navigate this complex topic, we will break down the core issues producers face. This guide explores the physical reality behind analog sound, the hidden costs of ownership, the workflows that actually boost creativity, and the psychological biases that can sabotage your sonic goals, providing a roadmap for intelligent studio investment.
Summary: Why Your Expensive Gear Might Be a Waste of Money
- Why Do Tape Machines Add « Warmth » That Plugins Only Approximate?
- How to Keep a 40-Year-Old Compressor Working Without Monthly Repairs?
- Full Analog, Hybrid or In-the-Box: Which Workflow Produces Better Results Per Hour?
- The Analog Obsession That Costs Thousands Without Improving Your Music
- When Should You Buy Vintage Gear for Best Value in the UK Market?
- How to Make Your Digital Synths Sound Warm Without Spending £5,000 on Hardware?
- New Focusrite or Vintage Neve: Which £400 Spend Gets Better Results?
- Why Does Your £2,000 Setup Sound Worse Than Your Mate’s £500 Rig?
Why Do Tape Machines Add « Warmth » That Plugins Only Approximate?
The word « warmth » is perhaps the most overused and misunderstood term in audio. It’s often wielded as a vague, mystical quality inherent to analog gear, particularly tape machines. However, this warmth isn’t magic; it’s a collection of predictable, measurable physical artifacts. Understanding these components is the first step in demystifying analog sound and learning how to replicate it intelligently, rather than paying a premium for the name on the box.
The core of analog warmth isn’t a single effect, but a cascade of subtle imperfections. A deep technical breakdown from Sound On Sound identifies the primary contributors. Firstly, there’s the non-linear harmonic distortion created by the tape’s magnetic formulation, which tends to fatten up low frequencies. Secondly, the physical construction of the record and playback heads introduces subtle phase shifts and frequency response irregularities that our ears interpret as pleasing character. This is something digital systems, by design, are built to avoid.
Furthermore, tape speed and the physical width of the tape itself play a huge role. Slower speeds naturally roll off high frequencies and introduce a slight « smearing » of transients, a form of natural compression. Finally, the magnetic saturation of the tape itself is crucial. When a signal is driven hard into the tape, the magnetic particles can no longer respond linearly. This results in a soft, musical compression and the generation of harmonics that add richness and density to the sound, a behaviour far more complex than simple digital clipping.
It’s this complex interplay of multiple, simultaneous, and slightly unpredictable physical phenomena that constitutes « warmth. » While digital plugins have become incredibly sophisticated at emulating each of these elements, they are modeling a chaotic physical system. The magic isn’t in the brand; it’s in the physics of magnetism, friction, and electricity interacting in a beautifully imperfect way.
How to Keep a 40-Year-Old Compressor Working Without Monthly Repairs?
The sticker price of a piece of vintage gear is just the entry fee. The real, ongoing investment is in maintenance, a factor that dramatically inflates the total cost of ownership. A 40-year-old compressor isn’t just an audio tool; it’s a delicate piece of electronic history that requires specialist care. Ignoring this reality is the fastest way to turn a dream purchase into a very expensive, and very silent, paperweight. As the experts at Supermarket Sound note, « vintage audio equipment often develops common issues. Degraded capacitors, corroded connections, and worn-out potentiometers are typical culprits. »
This isn’t an occasional problem; it’s a certainty. Capacitors dry out over time, causing their values to drift, which can completely alter the attack, release, and tonal characteristics of a compressor. Potentiometers (knobs) become scratchy due to oxidation. Vacuum tubes have a finite lifespan. These are not « if » scenarios; they are « when. » For a UK-based producer, this means factoring in the cost of technician time, sourcing rare parts (which can involve international shipping and import duties), and accepting significant downtime for your key equipment.
Proactive maintenance is the only way to ensure longevity and consistent performance. This isn’t just about fixing things when they break; it’s about a disciplined routine of care. Failure to budget for this ongoing cost is a primary reason why an expensive vintage rig can underperform. A poorly maintained Neve preamp will sound far worse than a brand-new, perfectly functioning Focusrite interface.
Your Vintage Gear Health Checklist
- Weekly User Check: Power up the unit and listen carefully for any new hum, buzz, or crackle. Exercise all knobs and switches through their full range to prevent oxidation.
- Annual Capacitor Check: Schedule a technician to inspect and test key capacitors for value drift. These are the components most likely to degrade and alter the unit’s core sound.
- Scheduled Service: Budget for a full power supply re-capping every 5-10 years, and annual tube testing/replacement for any valve-based gear. Verify calibration against original factory specs.
- Power Protection: Immediately install a high-quality power conditioner and voltage regulator. Vintage gear is extremely vulnerable to modern « dirty » power and voltage spikes.
- Build a Relationship: Find a reliable local UK technician *before* you buy a rare piece of gear. Their availability and expertise should be part of your purchasing decision.
The romance of vintage gear quickly fades when faced with a four-figure repair bill. Understanding and budgeting for these maintenance realities is what separates a professional investor from a hobbyist collector.
Full Analog, Hybrid or In-the-Box: Which Workflow Produces Better Results Per Hour?
Beyond sound and cost, the choice between analog, digital, and hybrid workflows has a profound impact on a producer’s most valuable asset: their time. The question isn’t just which method sounds « best, » but which one facilitates a more creative and productive process. Each approach introduces a different kind of cognitive friction, and the optimal choice depends entirely on the artist’s goals and temperament.
A full analog workflow is an exercise in commitment. With no « undo » button and limited track counts, every decision is weighty. This high-friction environment forces deliberation and performance commitment, often leading to stronger core recordings because there’s no safety net. However, it’s also slow, requires physical patching, and makes recall of a mix a painstaking, often impossible, task. The « results per hour » can be very low in terms of quantity, but potentially very high in terms of artistic intent.
Conversely, a purely « in-the-box » (ITB) digital workflow offers near-zero friction. With infinite tracks, instant recall, and endless plugin choices, the possibilities are limitless. This can be incredibly liberating, but it also carries the risk of « option paralysis, » where the producer spends more time auditioning kick drum samples than actually finishing a song. The sheer lack of limitations can, paradoxically, stifle creativity by removing the need for decisive action.
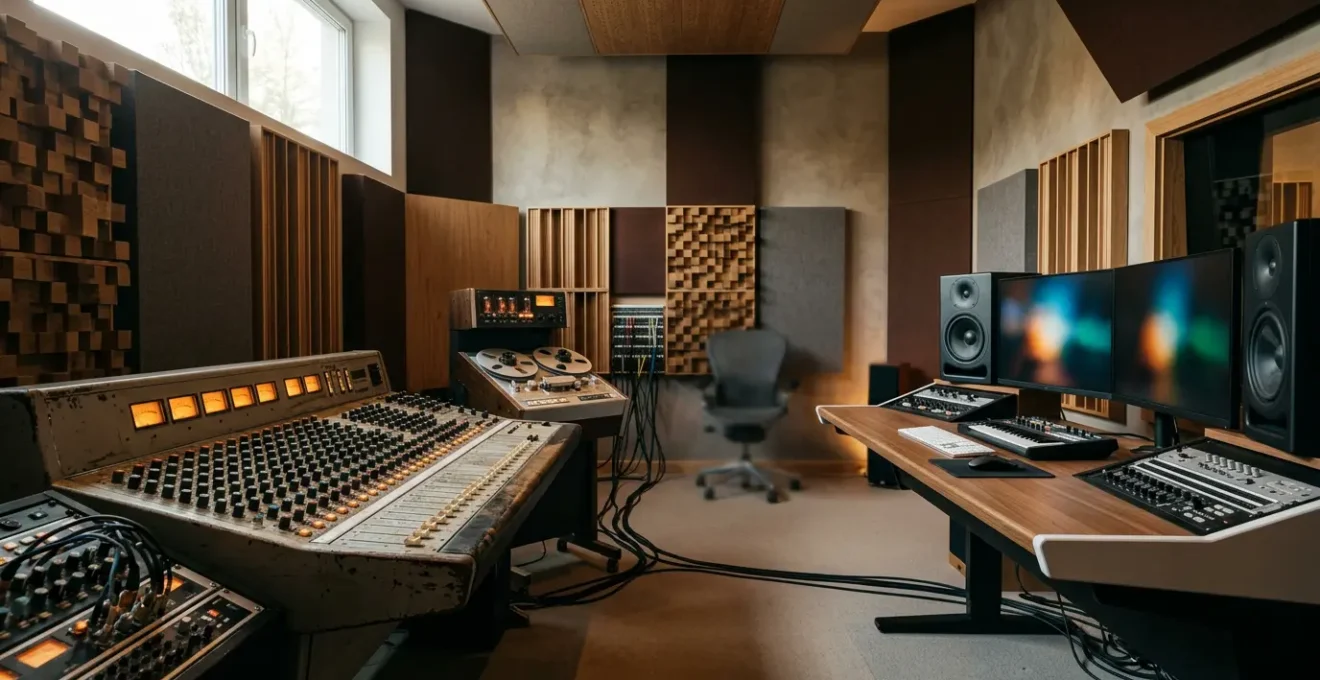
This is why the hybrid workflow has become the de facto standard for most professional studios. It seeks the best of both worlds: the tactile, commitment-forcing nature of analog gear on the « front end » (for tracking key elements like vocals and bass) combined with the speed, flexibility, and recallability of a digital audio workstation (DAW) for editing, arrangement, and mixing. It allows the producer to introduce analog’s « vibe » and « mojo » at critical points, while retaining the efficiency of the digital domain for the bulk of the work.
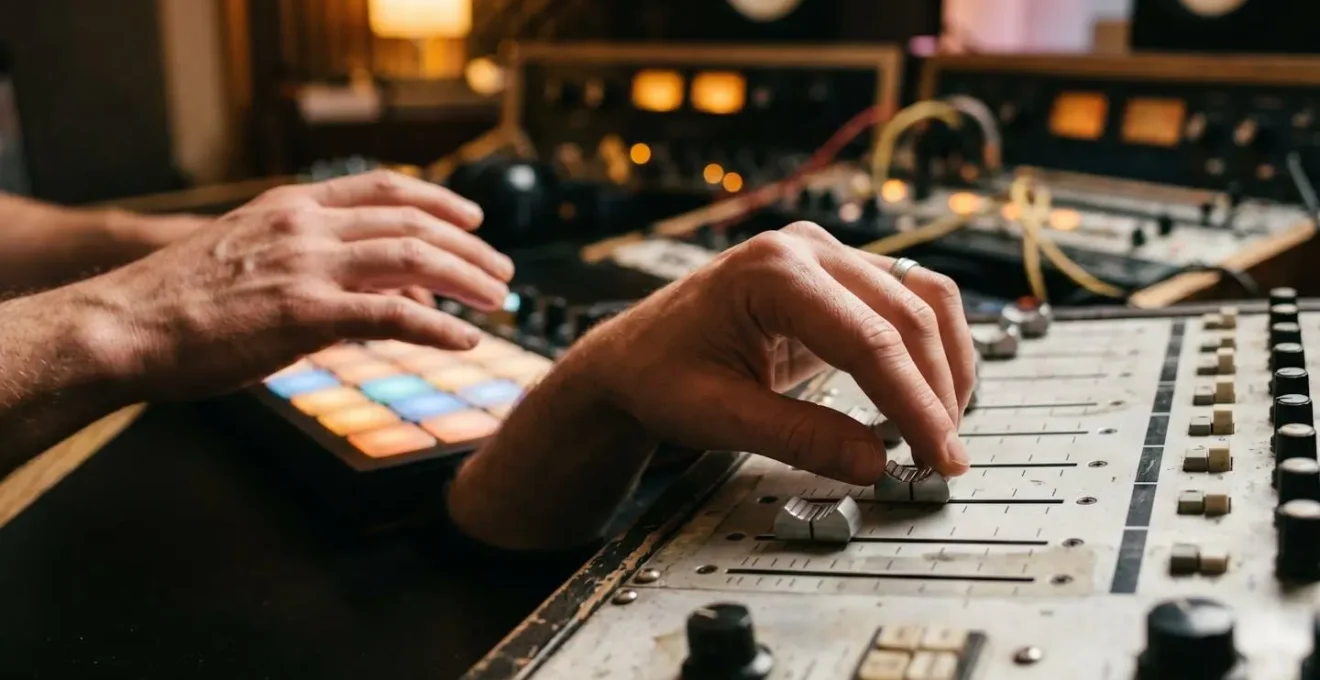
As the image suggests, the hybrid approach is about a tactile, interactive relationship with sound. It’s about using your hands and ears to make bold choices with physical faders and knobs for the most important elements, then leveraging the power of the mouse and keyboard to assemble the final product. This workflow strategically manages cognitive friction, using it to inspire commitment during tracking and removing it to accelerate the mixing and editing phases, arguably offering the best overall return on time invested.
The Analog Obsession That Costs Thousands Without Improving Your Music
Here we arrive at the most uncomfortable and most important truth in the analog vs. digital debate: the most biased piece of equipment in your studio is your own brain. The belief that expensive gear automatically sounds better is fueled by powerful cognitive biases that can lead producers to waste thousands of pounds chasing a sonic improvement that exists only in their minds.
The primary culprit is confirmation bias. This well-documented psychological phenomenon is the tendency to seek out, interpret, and recall information in a way that confirms one’s pre-existing beliefs. As a technical writer for Audioholics explains, this bias means that if you spend £3,000 on a vintage preamp, your brain is highly motivated to hear a £3,000 improvement in sound quality, whether it’s actually there or not. You will focus on any subtle difference that supports your purchase decision and ignore evidence to the contrary.
Confirmation bias is a tendency to ‘search for, interpret, favor, and recall information in a way that affirms one’s prior beliefs or hypotheses’
– Audioholics (citing cognitive psychology research)
This isn’t a matter of opinion; it has been proven conclusively in controlled listening tests. When listeners know what they’re listening to, their preferences are overwhelmingly influenced by brand reputation, price, and appearance. However, when the tests are conducted « blind » (where the listener doesn’t know which device is which), these preferences often evaporate or even reverse.
Case Study: The Harman International Blind Test
In a landmark 1994 study, audio professionals and trained engineers were tested on loudspeaker evaluation. The results were staggering. During « sighted » tests, where they could see the equipment, psychological factors like brand loyalty were so powerful that they completely overshadowed real acoustical differences. Listeners became effectively deaf to changes in speaker placement and room interaction. When the same tests were conducted blind, the results changed dramatically, revealing the sighted ratings to be almost entirely unreliable. This study proved that even for trained experts, seeing the gear fundamentally changes what they « hear ».
The effect is not trivial. Further research published in the Journal of the Audio Engineering Society found that factors such as personal preferences, equipment appearance, and listener expectations can cause errors in judgment of up to 40% of the total scale. That’s a monumental margin of error, driven entirely by psychology, not acoustics. This is the « analog obsession » in action: a feedback loop where a financial investment creates a psychological need to justify that investment, preventing objective assessment and genuine sonic improvement.
When Should You Buy Vintage Gear for Best Value in the UK Market?
Despite the high costs and potential for bias, there are absolutely times when buying vintage gear is a smart, strategic move that can elevate your sound. The key is to approach the market not as a collector chasing a brand name, but as a value investor seeking specific sonic tools to solve specific problems. For a producer in the UK, this requires a disciplined, research-driven approach to navigate a market filled with both hidden gems and expensive traps.
The first rule is to never buy a piece of gear just because a famous producer used it. Your workflow and musical needs are unique. The goal is to identify a sonic gap in your current setup and find the single best tool to fill it. Do you need a compressor to add « glue » to your drum bus? Or a preamp to add harmonic weight to a lead vocal? Define the problem first, then seek the solution. This focus prevents « Gear Acquisition Syndrome » (GAS) and ensures every pound spent serves a musical purpose.
Secondly, timing and patience are critical. The vintage market ebbs and flows. A piece of gear that’s hyped by a popular YouTube channel might see its price double overnight. The savvy buyer waits for the hype to die down. The best value is often found in less-fashionable but equally high-quality units from the same era or by looking at decommissioned broadcast equipment, which is often built to a military-grade standard. It’s about buying the sound, not the story.
To succeed in this market, a UK producer should adopt a specific set of strategies:
- Research and Community: Before even looking at listings, thoroughly research specific model numbers. Join UK-specific forums like the Gearspace UK & Ireland section to understand local market values, common faults, and who the trusted technicians are in your area.
- In-Person Testing: Whenever possible, test equipment in person. For a £1,500 compressor, a train ticket to another city is a small price to pay for peace of mind. Check every input, output, knob, and switch for full functionality.
- Budget for Restoration: Assume any piece of vintage gear will need work. Get a quote from a technician and add that to the purchase price to understand the true total investment. A £500 « bargain » that needs £800 of work is not a bargain.
- Prioritise Local Support: Prioritise models that are well-supported by UK technicians. A rare American or Japanese unit might be a nightmare to get serviced long-term, even if it’s cheap to acquire initially.
- Source from UK Channels: Explore specialist UK dealers like Funky Junk or KMR Audio’s used sections. Keep an eye on audiophile communities and broadcast equipment auctions, which can be a source of incredibly well-built and undervalued gear.
How to Make Your Digital Synths Sound Warm Without Spending £5,000 on Hardware?
The good news for producers on a budget is that the core characteristics of analog « warmth » can be convincingly recreated in the digital domain—if you know what you’re doing. The secret isn’t to find one magic « analog » button, but to build a chain of subtle imperfections, mimicking the way physical components interact in a real-world signal path. This approach requires more thought than buying a £5,000 synth, but the results can be just as musically satisfying.
The first step is to stop thinking of digital oscillators as perfectly stable. A key part of the vintage sound is « drift »—tiny, random fluctuations in pitch and tuning. This can be emulated by using a Low-Frequency Oscillator (LFO) with a « random » or « sample & hold » waveform, mapped at a very low intensity (e.g., 1-2%) to the oscillator’s fine-tune parameter. This subtle, constant movement breathes life into a static digital sound.
The next stage is to emulate the signal path. Instead of one heavy-handed saturation plugin, build a virtual channel strip. Start with a light tape emulation to gently roll off harsh high frequencies and add natural compression. Follow this with a console emulation plugin to introduce subtle harmonic distortion and crosstalk. Finish with a broad, gentle EQ to shape the overall tone. Each layer on its own is almost imperceptible, but together they create a rich and complex texture that feels authentically analog.
Here are some advanced techniques to add that elusive warmth to your digital synths:
- Layer Subtle Imperfections: As mentioned, chain multiple light effects. A tape plugin into a channel strip plugin into a gentle EQ will always sound more authentic than one aggressive distortion unit.
- Embrace Instability: Use LFOs mapped to pitch and filter cutoff to mimic the voltage-controlled instability of real analog circuits. The key is subtlety; the effect should be felt, not obviously heard.
- Vary Your Tape: Use different tape emulation settings for different tracks. On a bright instrument like a hi-hat, try a slower tape speed setting (e.g., 7.5 IPS) to naturally tame the transients and add a low-mid bump without reaching for a compressor or EQ.
- Strategic Saturation: Don’t just apply saturation globally. Drive the input of a tape or console plugin on key elements like a lead vocal or snare drum to generate organic-sounding harmonics that help it cut through the mix with presence and edge.
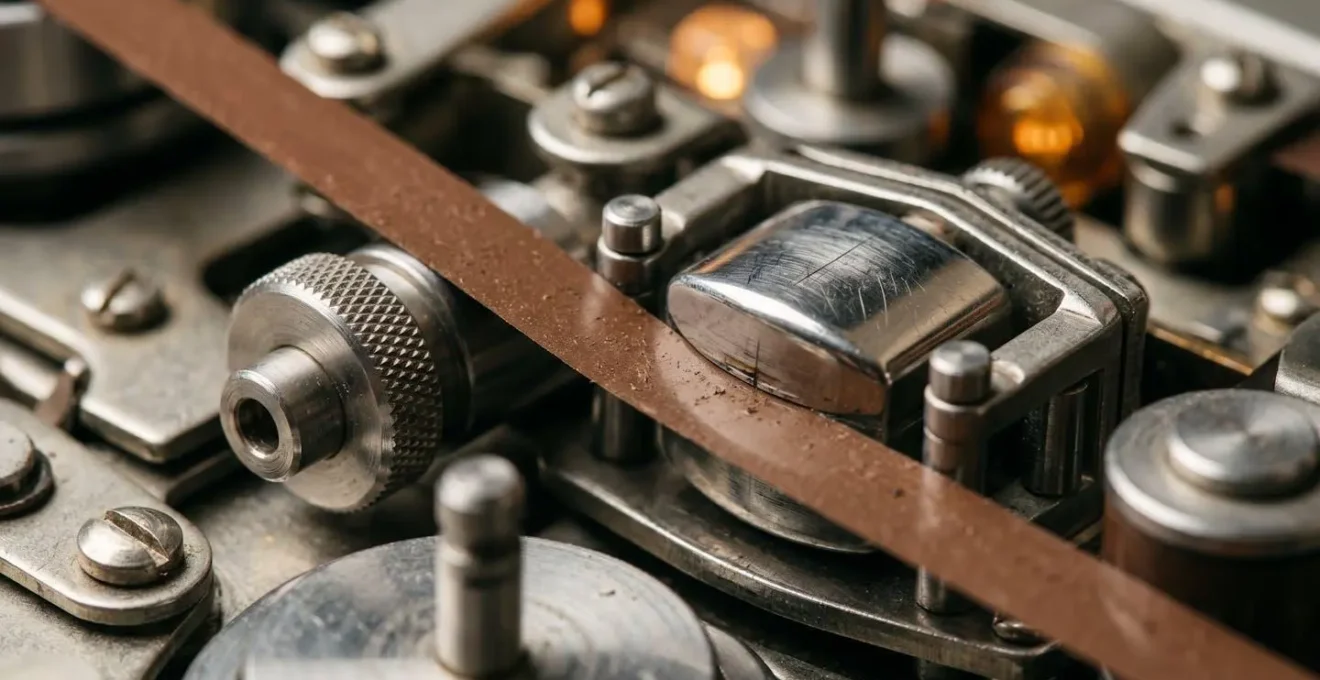
Ultimately, achieving an analog sound in the digital realm is an exercise in artistry and observation. It’s about studying the physical world of tape, tubes, and transformers, as shown in the intricate mechanics above, and then using your digital tools to thoughtfully recreate the beautiful flaws that give vintage gear its soul.
New Focusrite or Vintage Neve: Which £400 Spend Gets Better Results?
This is a classic dilemma for an aspiring producer. You have a modest budget of £400. Do you buy a modern, all-in-one audio interface like a Focusrite Scarlett, or do you stretch for a single-channel clone of a legendary vintage preamp like a Neve 1073? From a « value-assessing » perspective, the answer is overwhelmingly clear, but it cuts against the grain of much online gear hype. It’s a perfect test case for understanding the difference between a tool and a complete system.
A new Focusrite interface for £400 is a complete recording solution. Out of the box, it provides multiple clean preamps, high-quality analog-to-digital converters, a way to connect to your computer (USB), a headphone amp for monitoring, and often a bundle of software including a DAW and a suite of plugins. It is a fully functional, self-contained system that allows you to start and finish a song immediately. The sound is designed to be transparent and uncolored—a blank canvas for your creativity.
A £400 vintage Neve clone, on the other hand, is not a system. It is a single component. It is a « color box. » On its own, it can do nothing. To even get a signal into your computer, you will still need to buy a separate audio interface with converters (adding another £200-£300 to the cost), plus specialized cables. It provides a single channel of that desirable, warm, harmonically rich Neve sound, but at the expense of flexibility and a much higher true total cost.
The right choice depends entirely on your current situation. For a beginner or a producer who needs to get work done, the modern interface is the only logical choice. It provides the tools to produce a finished song. The vintage clone is a luxury item, a specialist tool for an experienced engineer who already has a complete, functioning system and is looking to add a specific flavor on a key source, like a lead vocal. The following table breaks down the true value proposition.
| Factor | New Focusrite Interface (£400) | Vintage Neve Clone (£400) |
|---|---|---|
| What You Get | Complete recording solution: multiple mic preamps, A/D converters, direct monitoring, USB interface, bundled software (DAW, plugins) | Single channel of colored preamp only – no interface, converters, or monitoring solution included |
| True Total Cost | £400 all-in, ready to record immediately | £600-£700 realistic (£400 preamp + £200-300 interface required to connect to computer + specialized cables) |
| Sound Character | Transparent, clean signal path with wide dynamic range and flat frequency response | Colored tone with transistor warmth, harmonic saturation, and transformer coloration on that single channel |
| Workflow Impact | Enables complete production from tracking through mixing with included tools and multiple simultaneous inputs | Provides specific tonal flavor for one source at a time; requires separate interface and limits flexibility |
| Best For | Beginners needing complete setup; producers prioritizing finished songs over specific vintage tone | Experienced engineers with existing interface seeking specific Neve-style coloration on key sources |
| Long-term Value | Driver support, warranty, software updates included; scales with expanding production needs | No official support; requires periodic maintenance; clone quality varies significantly by manufacturer |
As this comparative analysis makes clear, choosing the component with the more famous name over a complete, functional system is a classic rookie mistake. Better results come from a complete toolkit, not a single magic bullet.
Key Takeaways
- Analog « warmth » is not magic; it’s a set of measurable physical artifacts like harmonic distortion and phase shift that can be understood and even emulated.
- The price of vintage gear is only the beginning. The Total Cost of Ownership—including maintenance, repairs, and downtime—is a far more critical financial metric.
- System synergy is everything. A well-matched, inexpensive system will always outperform a collection of expensive, mismatched components in a poor acoustic environment.
Why Does Your £2,000 Setup Sound Worse Than Your Mate’s £500 Rig?
This is the ultimate question, the one that causes the most frustration and self-doubt for aspiring producers. You’ve done the research, saved up, and invested £2,000 in a « better » interface and a « superior » microphone, yet your mate’s tracks, recorded on a basic £500 setup, consistently sound punchier, clearer, and more professional. The reason is rarely the gear itself, but everything around it. A great sound is the product of system synergy, where every link in the chain works in harmony. Your mate’s success is proof that a well-understood, modest system will always beat a poorly integrated, expensive one.
The three most common culprits for an expensive setup sounding bad are, in order of importance: the room, the monitoring, and the user. You can have a £10,000 microphone, but if you’re recording in a small, square room with bare walls, you are primarily recording the sound of that terrible room. Your mate, who has spent £50 on some DIY acoustic panels and placed his desk away from the wall, is working in a sonically superior environment. His £100 microphone is capturing a cleaner, more direct source, which will always be easier to mix.
Secondly, if you can’t hear what you’re doing accurately, you can’t make good mixing decisions. Your £2,000 setup might include expensive monitors, but if they are placed incorrectly in an untreated room, their frequency response will be wildly inaccurate. You might be boosting bass to compensate for a null in your listening position, resulting in a boomy, muddy mix when played anywhere else. Your mate’s £150 headphones, while not perfect, provide a more consistent and translatable monitoring environment, allowing him to make better judgments about EQ and compression.
Finally, and most importantly, is the user’s skill. Your mate with the £500 rig probably knows his equipment inside and out. He knows exactly how hard to drive his preamps without clipping, understands proper gain staging, and has mastered the five plugins that came with his DAW. You, on the other hand, might be so overwhelmed by the options in your expensive setup that you haven’t mastered any of them. As Moon Audio’s analysis concludes, successful audio reproduction is about harmonious system integration, not the cost of individual parts. Your friend has built a functioning system he understands; you have merely purchased expensive components.
The path to a professional sound doesn’t run through a store catalogue. It’s built on knowledge. Instead of asking « What gear should I buy? », start asking « What skills do I need to learn? ». Invest your time in understanding acoustics, mastering gain staging, and learning your current tools. Only then can you make an informed decision about what single piece of equipment will provide the most significant upgrade to a system you already command.